Garlic Bread- The most Luring Bread Variety

Garlic bread is a great appetizer. This a very easy and simple way to make your own.

Pasta in chilli Sauce

Pasta has become a weekly dinner for us. This is yet another very easy and quick to make Pasta recipe.

Coconut Cookies

A Yummy delight. Easy, simple and delicious cookies make at home within minutes.

Capsicum Rice - Must try!

Capsicum + Rice = Delicious! , A must try vegetarian healthy recipe.

Healthy Spinach Rolls

Easy and healthy snack ,the kids will love.

SUBSCRIBE via RSS
What is RSS?

OR SUBSCRIBE Via email:
Showing posts with label vegetarian Tiffen items. Show all posts

5.18.2009

Pesarat - A dosa variation

I know Pesarat is an Andra specialty. Whenever we go to a restaurant in India, I never miss to see this item in the menu. But never have ordered this. To be frank, I have never tasted Pesarat until recently. If you are anything like me, I would really suggest you give it a try. I loved the taste and spiciness and couldn't stop eating. This is a very simple variation of dosa. The variation is on the way we prepare the dough and the most important thing is we need not ferment the dough. How convenient? we can eat it on the same day we crave these.

Ingredients:

1/2 cup raw rice
1 cup Green gram
2 green chillies
1/2 inch ginger
1 medium onion finely chopped
1/4 cup of finely chopped coriander leaves
salt to taste
1 tsp cumin seeds
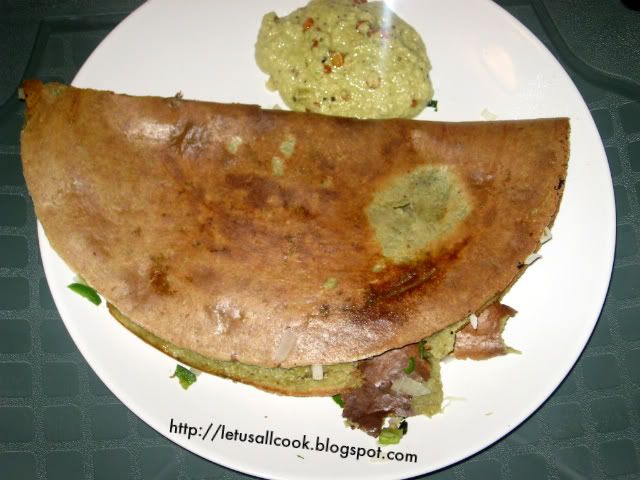
Pesarat


Method:

Soak the rice and gram together for at least 6 hrs. Grind it to a dosa batter consistency with salt, green chillies,ginger and cumin seeds.

Now in a Tawa, pour this batter and cook it in a medium flame. Make the dosa very thin and add the chopped onions and coriander leaves on top of it.

Cook on one side. Do not turn. Wait till it is fully cooked and serve hot with any chutney of your choice.

Note: If you want you can also add some chopped green chillies and ginger on top of your dosa to make it spicy.
12.11.2008

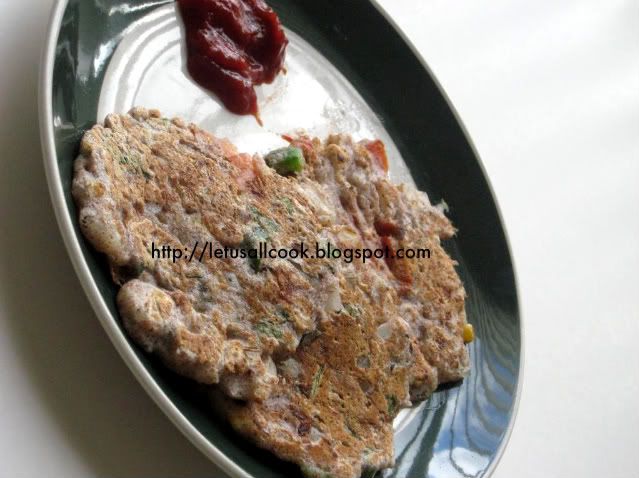
Ragi Dosa - A healthy Treat

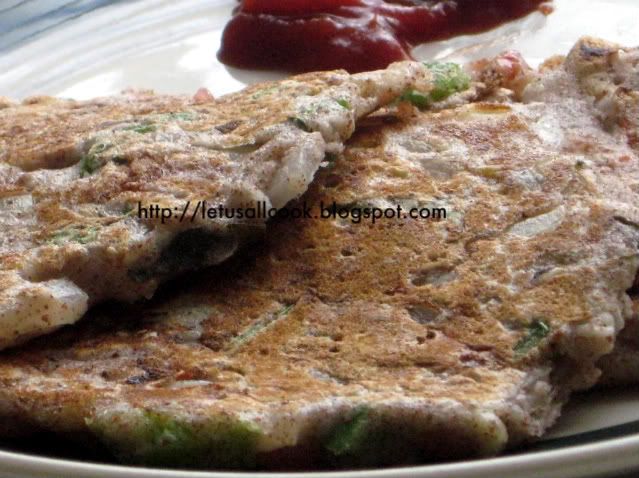
Eat Healthy - Fight Diabetes event is a great source of healthy recipes. I still have to try out a lot of recipes from that. To start with, I made Ragi Dosa of Srilekha's. I added some vegetables to make it more healthy. I must say, Ragi dosa did taste like normal dosa and I found it even more tastier with Chilli sauce than any chutney. Ha! Chilly(Silly) me!


Ragi Dosa

Since it has ragi (Finger millet), vegetables I am sending this to my eat healthy during pregnancy contest. Ragi is very good source of amino acid methionine. A great food which helps us to maintain our weight too. What else can a girl ask for? So here comes Ragi Dosa recipe, my version.


Ingredients:

1 cup Ragi flour
2 cups of Dosa batter (Chk out how to make dosa batter here)
1/2 cup onions, chopped finely
1/4 cup tomatoes, chopped finely
1 tbspn of corn (you can use frozen corn)
1/2 cup vegetables of your choice(I used carrots,spinach)
2-3 tsp of oil
Salt to taste (As the dosa batter will already have salt, be careful with the amount)
few chopped curry leaves
few chopped cilantro
few chopped nuts(optional)

Ragi Dosa

Method:

In a bowl, mix all the ingredients and let it rest for 2 min.

In a Tawa/Griddle, add 1 tbspn of the batter, spread it and make a round shape.

Add 1 tsp of oil, Cook for 1 min and turn. Cook for another 30 sec.

Check if both sides are cooked. Repeat this process until you are out of batter.

Serve hot with Chilly sauce or chutney.

11.26.2008

Puffed Poori/Puri - Reader's question (How To)

How to make the Puri/poori puff up? How do you make the poori stay puffed for a longer time?How can you make Poori not absorb more oil? These are few of the usual questions we get while cooking poori. I received few mails asking these same questions and so I thought of making Poori to find out. Not only this, my good friend Jai, asked me to post Poori recipe. So here comes the Poori, all puffed up.

Puffed Poori - How to

Ingredients:

1 cup Wheat flour (atta)
2 tsp Suji/Semolina
Warm water to make the dough
Few drops of Oil to coat the dough
Oil to deep fry
Salt to taste

Method:

In a bog bowl, mix the flour,salt and Suji. Add warm water little by little and make the dough.

The dough must be a tight dough, unlike chapati dough which is soft.

When the dough is ready coat it with few drops of oil and rest the dough for 15 min.

Do not rest it for more than 15-20 mts. Poori, unlike chapati must be prepared immediately after making the dough.

In a Kadai/Pan, heat the oil.

Meanwhile, take small portion of the rough and press it into a round shape, using the roller.

Now add the Poori into the hot oil.

Serve hot with Potato Masal (the same one which we use for masal dosa), chutney or side dish of your choice.

Now to the regular questions,

How to make the Poori Puff up?

When you add the Poori in the hot oil, wait till it comes up and immediately press it with a big spoon. Immerse it in the oil and this will release the bubbles and the poori will puff up.

Note: If you press the poori,

- before it floats on the oil, the poori will never puff up.

- few seconds after the poori floats in oil, it will form lots of small bubbles.

How can you make poori stay puffed up for longer time?

This was a mystery to me too. But, recently I figured out that adding little bit of Suji/Semolina will make the poori stay puffed for a longer time. I learnt this from Sanjay (Vah Chef).

How can you make Poori not absorb more oil?

This is very simple, always use fresh oil for frying. When you use oil which has been used more than once, poori will absorb a lot of oil and stay sticky.

Hope my learning was useful. Make puffed Poori and let me know if these tricks worked for you too. Do you have any special tips that you use while preparing Poori? Share it with us!

11.09.2008

Corn Paratha with Onion Raita - Recipe from a reader

I am very excited. Yes this is my first recipe which I received from one of my readers through the submit a recipe form. This Corn Paratha with Onion Raita recipe is from 'Chinar Pandya'. I am very happy to share the recipe with you all.

Corn Paratha is actually new to me. I have never tried Corn Paratha. After reading the recipe, I feel that it is worth a shot and will try as soon as possible. Do let us know if you have already tried this Corn Paratha.

Ingredients for Corn Paratha:

1 cup sweet corn, boiled(only shred whole beans, don't grate)
1 onion chopped
1 small green chilli
A tiny piece of ginger
Salt to taste
coriander leaves
1 cup Wheat Flour

Ingredients for Onion Raita:

2-3 medium sized onions
1 bowl of Yogurt
10-12 peanuts(fried and powdered)
Sugar and Salt to taste
coriander leaves
2 teaspoons oil
1 tsp cumin seeds

Method:

Take boiled corn in a bowl. Add chopped onion,green chilly, grated ginger, salt and coriander leaves.

Put it aside.

Now make paratha dough with flour, and use the above mixture as a stuffing and make parathas out of it.

Take a look at how to make plain paratha recipe, in which I have explained the step by step method of preparing Parathas.

Onion Raita
(I wanted to add a picture so I added my old Raita Picture)

How to make Onion Raita:

Now take Yogurt in a bowl.

Add sugar and salt to taste.

Add peanuts powder just enough to thicken it.

Grate onions and add in the mixture.

Also add coriander leaves.

Now take 2 tsp oil in a pan and heat. Add cumin seeds to it and keep on heat for half a minute.

Let the oil come to room temperature, add the same to cold yogurt.

It tastes best with parathas.

I Thank Chinar Pandya for sharing this recipe with us. Keep them coming!

I request all my readers to make use of the Submit a recipe form and share all your great recipes with us. Please include a picture of your recipe too. It helps us to relate to the recipe.

11.04.2008

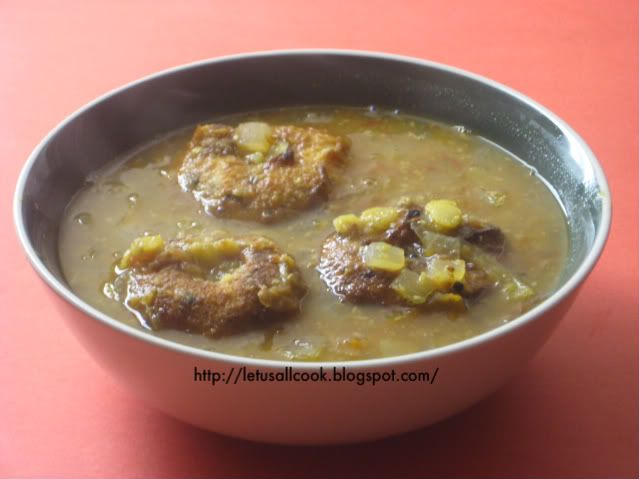
Sambhar Vada

This is a very famous Breakfast recipe in South India. The very thought of this recipe makes me drool. Generally it is the Medu vada soaked in Sambhar, a tangy tamarind sauce. But the Sambhar which is used for this recipe is slightly different from the Sambhar we prepare to eat with rice. It tastes different and more saucy.

Any South Indian Hotels will have this in their menu card and the very sight of this recipe makes you go glutton. Here is the Medu Vada recipe. Now for the Sambhar in which it is soaked.

Sambhar Vada

Ingredients:

1 cup Onions,Finely chopped
1/2 cup Toor Dal/Red gram Dal
1 cup tamarind juice
2 Tomatoes, sliced
Small bunch of Coriander leaves, Chopped finely
2 tsp Oil
Salt to taste
1 tsp Mustard
1/4 tsp Hing/Asafetida
Few curry leaves

To Roast & Grind:

2 tsp Dhania/Coriander Seeds
11/2 tsp Urad Dal/Black gram Dal
1 tsp Jeera/Cumin Seeds
2 tsp Channa/Bengal gram Dal
4-5 Red Chillies
1/2 tsp Fenugreek Seeds
1/4 cup of Grated Coconut
2 tsp of oil

Method:

Heat the Oil and fry the 'Ingredients to Roast & Grind' until golden.

Grind to a smooth paste.

Heat Oil in a pan and add mustard seeds. When the seeds pops add hing and cumin seeds and curry leaves.

Now add the onions and and fry for 1 to 2 minutes.

Add the Tomatoes and mix well.

Add enough water and cook it till soft.

Cook red gram dal in pressure cooker and mash well.

Add mashed dal, tamarind extract, and ground paste with salt and enough water to the cooking onions and tomato mixture and bring it to boil.

You can also serve this sambhar with Idly/Dosa.

Soak the vadas for 10 minutes and then serve.

10.27.2008

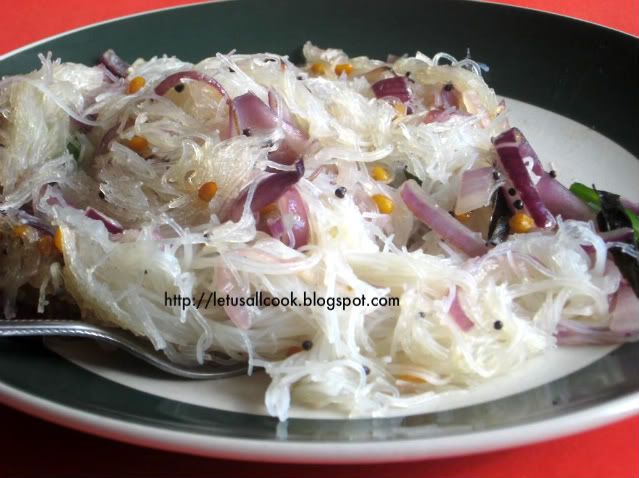
Sevai prepared from leftover Idiyapam

Last weekend I tried Idiyappam, whose recipe I posted very recently. The thing is, with over enthusiasm I prepared more than what we required for our dinner. he!he! sometimes, no! no! most of the time I prepare in huge quantities not because I am lazy (so that I can use the leftovers for later), but I am used to it. I was in a joint family in India. Totally we were 6 people of different taste, especially when it comes to food, under the same roof.

Everyday me, my MIL and my co-sister prepare Lunch and dinner. Usually it will be in large quantities. Now you know why I tend to prepare in large quantities. Anyways cooking for two is much better than cooking and eating by yourself. Of course there is an exception if it is your favorite recipe.


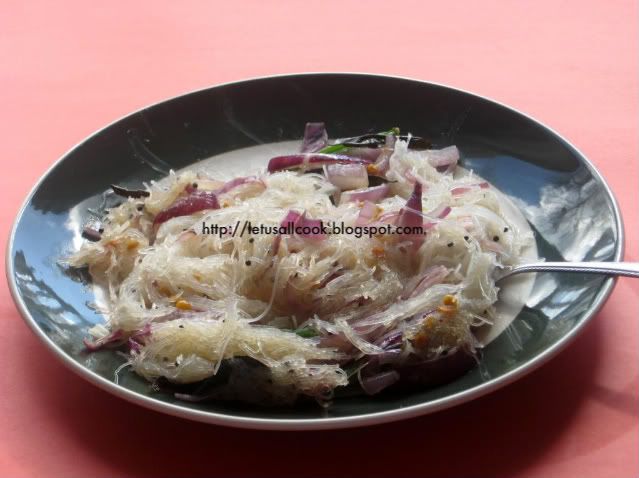
Idiyappam/Sevai Upma

Coming to what I did with this leftover Idiyappam. I prepared Sevai or Iddiyappam upma or however you call it. Very simple and quick recipe. This is similar to Semiya(Vermicelli) Upma.

Ingredients:

1 cup Idiyappam (Rice Noodles) - Check out how to prepare Idiyappam.
1 tsp urad dal
1 tsp channa dal
1 tsp mustard
A pinch of Hing
1/2 cup lengthwise chopped onion
2 green chillies, chopped lengthwise
salt to taste
2 tsp oil
2 tsp lemon juice.

Idiyappam/Sevai Upma

Method:

In a pan, add oil, mustard seeds. When it pops add hing, urad and channa dal and saute.

Now add the green chillies and onions and saute till light brown.

Add salt.

Add the leftover Idiyappam or freshly prepared rice noodles and mix well.

Since Idiyappam is already cooked, just mix well and switch off the stove.

Add lemon juice and serve hot with Chutney/Dip.

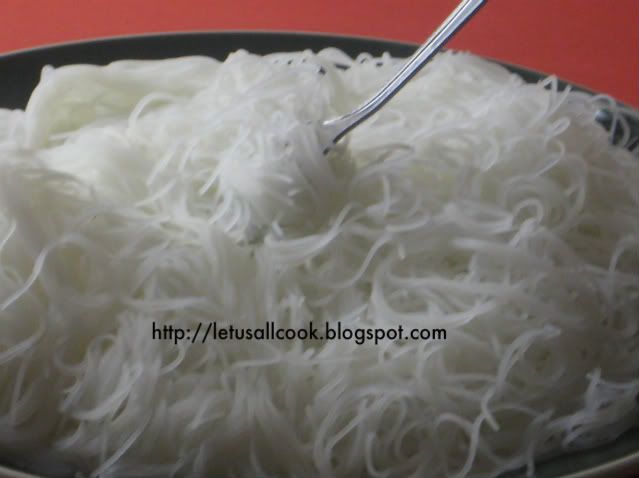
Idiyappam (Rice Noodles) Recipe

For me, if it is Idiyappam, it is always Thenga pal (coconut Milk). I love this combo. It is a very famous Indian breakfast/Dinner recipe, a kerala recipe to be specific. Any Indian hotel will have this in their menu card. You can also eat this Idiyappam with Kurma (vegetable or chicken). As this is also a steamed dish like Idly, it is very healthy. This is one of the simplest recipe I have ever learnt. Very easy preparation and cooks within minutes.

Idiyappam recipe

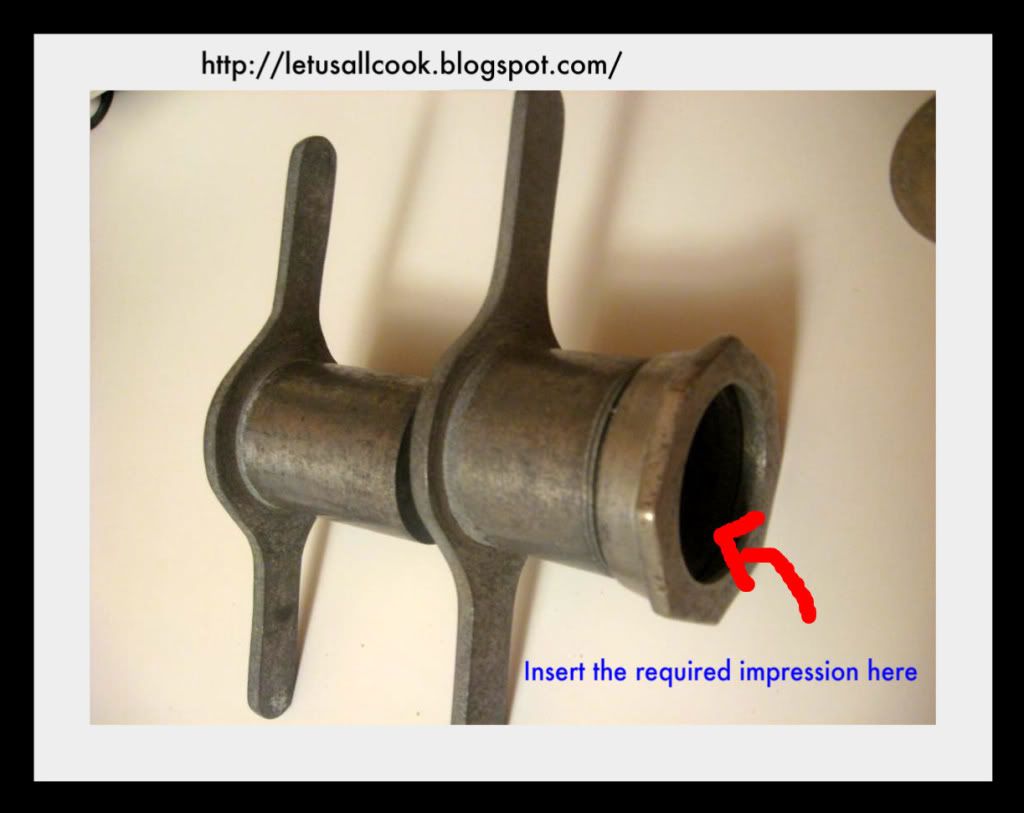
You need a presser for making this Idiyappam. You can get this in any Indian shop which sells vessels. Wiki says, It is also called noolappam or noolputtu from the Malayalam word for string, nool, but is most commonly know as Idiyappam or String Hoppers.

Ingredients: (To serve 2)

1 cup of rice flour
salt to taste
warm water to knead
1 tsp of oil


Method:

Mix rice flour with required warm water and salt.

Knead into smooth dough, like chapati dough. Apply little oil over the dough and insert into the cooking press. I used the below presser.


Idiyappam maker

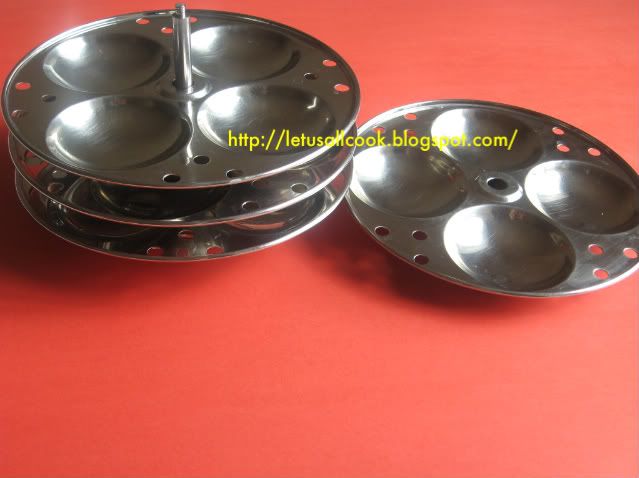
Put a small quantity of dough into the presser and press it on the idly moulds greased with oil. Below is a picture of Idly mould.


Idly moulds

Steam the idly cooker for 8-10 minutes.

Serve hot with coconut milk or Kurma.

10.25.2008

Podi Uthapam Recipe

Uthappam/Oothappam however you call it, is my favorite. Whenever I go to Saravana Bhavan restaurant near my place, I order this. The Uthappams are similar to dosas excepting that they are thick. There are many variations to this recipe. Plain Uthappam, Tomato and Onion Uthappam, Mixed Vegetable Uthapams etc. The Uthappam is also called Indian Pizza or pancakes.


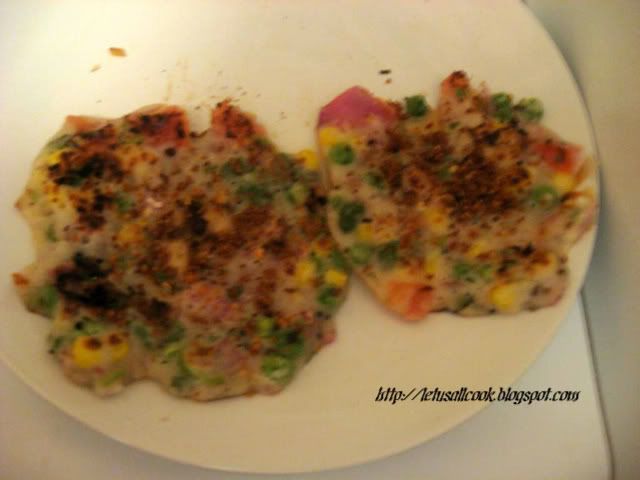
When I was preparing these the other day, my intention was to make the vegetable version. However, my husband wanted to eat these Podi uthappams and so I did a few quick ones. Podi is a Tamil word for powder. In this context it is referring chilli powder (Milagai Podi). You can also make these with vegetables.These pictures were taken in a hurry, so ...

Ingredients:

Dosa Batter
1 cup Milagai podi or Idly podi
few tsp of oil


How to make these Podi Uthappams?

For this first you have to make the Dosa Batter as explained in this making of Dosa/Idly batter video.

For Uthappams make the batter little thick.

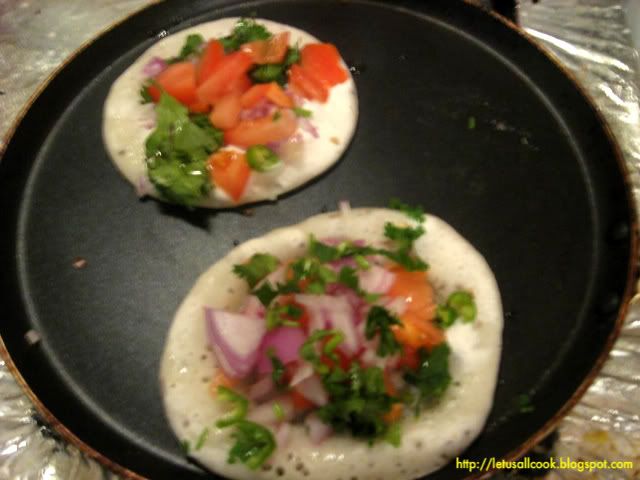
Spread the dough on the Tawa as shown in the above picture. Make sure that they are not crispy and they are thick.

Sprinkle the Idly podi or the Milagai podi on top and a tsp of oil.

Cook in a sim flame as we will be cooking only one side.

Serve hot.

As we are cooking only one side, either close the Uthappams with a vessel so that the other side is cooked or cook it in a sim flame.

You can serve these with chutney/dip.

To prepare,

Tomato and onion uthappam - same procedure use these vegetables on the dough and cook one side. (The above pic is taken when I was preparing these)

Vegetable Uthappam - Same procedure, use your favorite vegies.

10.22.2008

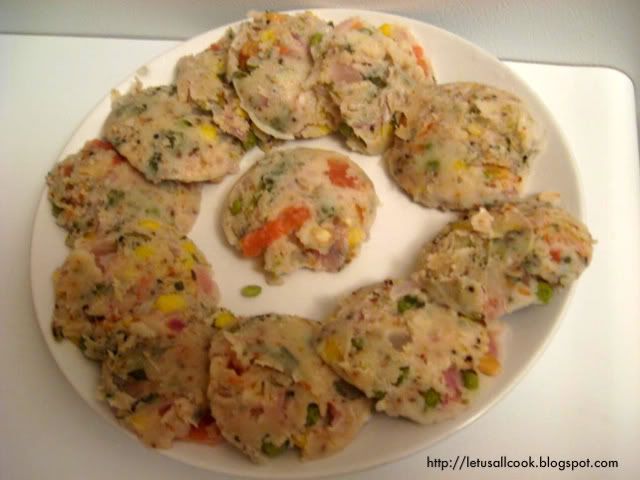
Vegetable Idly - A Healthy Breakfast Recipe

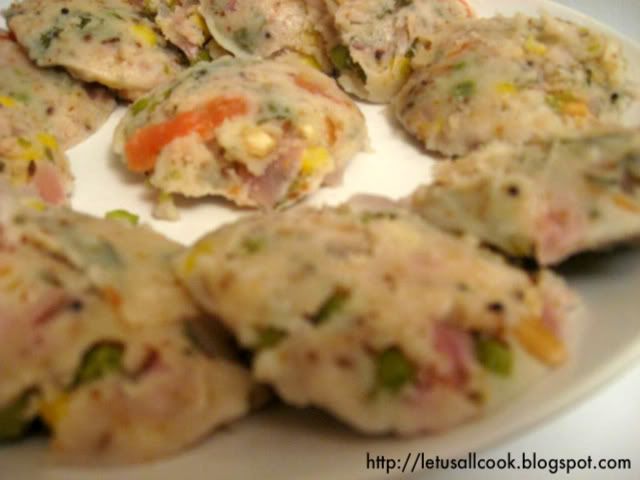
Sometimes this happens. Your Idly/Dosa dough ferments more than required and it will taste worse. The sourness makes you go yuck! But this time I tried a new way to make the dough still edible. Easy and quick way to cook with your leftovers. I had few carrots and beans which was not enough to make a side dish on their own. So I used them along with this Idly batter and made Vegetable idly.


To tell you the truth, it was not that bad. It tasted more like an Idly but still had these vegetables. Which means we are eating healthy! Simple huh? Even the color of the Idly was a bit different. I think it was because of the carrots I added.

To make this Vegetable Idly, you will need,

Idly Batter
1 cup of vegetables (Carrots, beans, tomatoes, peas, corn or any vegetable of your choice)

1 medium onion, finely chopped

few fried cashews (optional)

Salt to taste


Method:

Make the Idly batter as shown in this video.

Cut these vegetables into small pieces. I used frozen peas and corn. You may skip these or use the fresh ones instead.

Add these vegetables along with onions to the batter and add required amount of salt.

As you would have already added salt for your Idly batter, it is enough if you add a tsp of salt for the vegetables.

Mix well and Pour it to the Idly cooker.

Cook it for 15 - 20 mts and serve hot with Chutney/Dip or Milagai Podi or even Sambar would go well with these.

I you feel that the vegetables will not be cooked, you can increase the time for 5 more min or can saute all the vegetables till half cooked in a pan before adding t hem to the idly batter.

Variations:

You can also add chopped Cilantro and curry leaves to the batter.

Also in a pan, add few drops of oil and then mustard seeds. When they pop, you can add 1 tsp of cumin seeds and then 1 tsp of channa and urad dal. Saute them and add it to the batter along with the vegetables.

Idly itself is a healthy breakfast as it is steam cooked and adding vegetables would be even healthier and be a perfect diet food.

10.21.2008

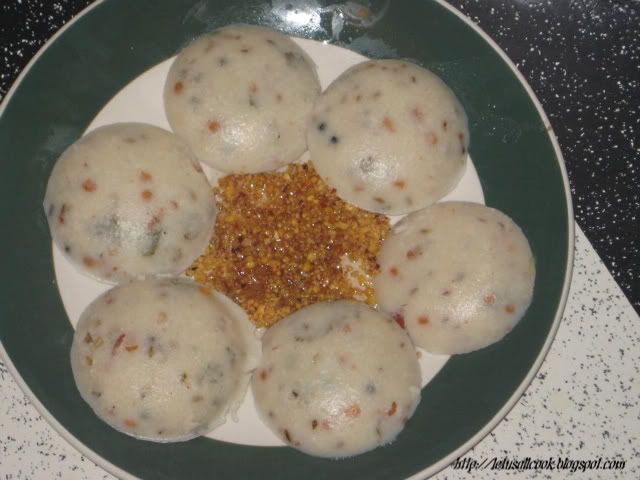
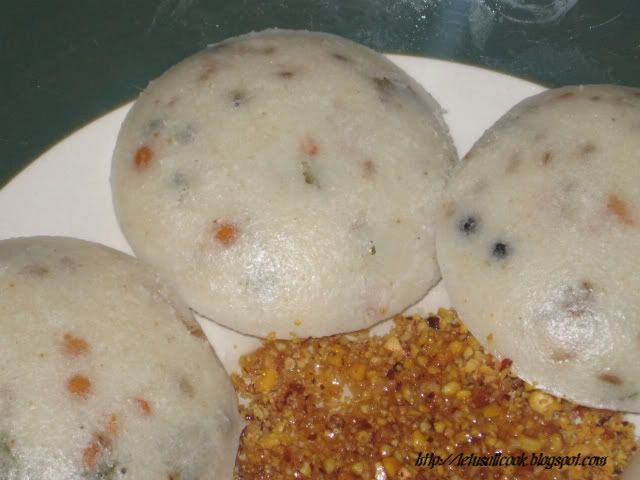
Authentic Kanchipuram idly - A South Indian Delicacy

Kanchipuram is my mom's native. I have been to Kanchipuram only twice. Both the times, to attend my relative's marriage. Though I know Kanchipuram is famous for its temples, the first thing that pops my mind is the Idly. The most famous South Indian breakfast recipe as far as I know.


As a kid, I got carried away by the name. Even the same with Kushboo Idly. Do you even know the etymology of this idly variety? I have to do some research now. Is it the Hindi word meaning smell or aroma or is it referring to the South Indian actress Kushboo. I'll never know.

OK back to our Kanchipuram Idly. To prepare this recipe you will need,

1 cup split black gram (urad dal)
1 cup raw rice
1 cup boiled rice
1 tablespoon split Bengal gram (chana dal)
1 tsp cumin seeds
3/4 cup sour curd
Few fried cashews
4 green chillies, chopped(optional)
1 teaspoon grated ginger
1 teaspoon pepper powder or freshly ground pepper
3 to 4 chopped curry leaves
1 tablespoons ghee or Oil
salt to taste
oil for greasing the Idly plates.


How to Prepare Kanchipuram Idly?

Soak both the rice together and Urad dal separately.

Make the Idly batter as shown in this how to make idly batter video.

When you are going to make the idly, in a pan, add a tsp of ghee/oil and saute urad dal,channa dal, cumin seeds, curry leaves, pepper, ginger.

Add this to the fermented batter along with fried cashews and sour curd. Mix well.

Greece the Idly cooker, or the Idly maker with little oil so that the Idlys come out without sticking.

Pour the batter and cook it for 15-20 min.

Serve hot with Chutney/Dip or the famous Milagai Podi.

8.28.2008

Did you know your husband cooks?

If I had known my husband can cook this Kothu parotta so very well, I would have definitely prepared this and sent to MBP street food hosted by Sia. I never knew my husband could cook! Poor me! He had been hiding this great secret of his from me for a long time now (we know each other for more than 5yrs). Innocent me! With this note I have to tell you how I caught him as a chef. I must say a decent chef, for a person who doesn't even move his plate after eating. I know! My mil has pampered him in this regard.

It was a week back and I had some usual problems with my health. I was feeling very tired and slept at around 5PM in the evening. I had a great dream. I was strolling with my best friend near my house(in India) and to mention, I was in my 10th std in my dream. Good old days! Miss them!.Back to my dream. We had a tiff and she was consoling me. Suddenly, I must say, these things happen only in dreams, we saw a street shop and he was preparing...of course Kothu parotta.

Though we generally do not like the ambiance, the aroma lured us into the shop and obviously we were drooling. The waiter, instead of asking what we wanted to eat was yelling 'Get up! Its 8.00PM. Time to Eat! You can sleep after that.' and that too in my husbands voice. lol!

By now, all know that my sleep got disturbed and I was sitting with a plate full of Kothu Parotta prepared by my loving husband. Though I was very happy, I couldn't tolerate the fact that he messed up my kitchen. Yes! the Kothu Parotta tasted Divine. But my kitchen!omg! was a mess. I spent 30 mts cleaning it. But, it was a sweet surprise. I have requested him to give surprises like this, even if it takes my time to clean up after he is done with his surprises.


Now coming to the recipe (My husband's version of Egg Kothu Parotta).


Ingredients (Serves 2)

4 Parotta (It can be homemade or frozen)
2 Eggs
1 finely chopped onion
2 finely chopped green chillies
salt to taste
pepper to taste

Method:

Cook the Parotta. If Frozen parotta is used, then heat it and cook it before preparing this recipe.

Cut the parotta into small pieces. They need not be even, but need to be small.

In a pan, add oil and saute the onions till they turn light brown.

Now add the green chillies and half the salt.

Add the eggs and mix well.

Add little pepper.

When the egg is half cooked ,add the cut parotta and mix well.

Now check for salt and if needed add some.

While mixing, use a spatula to do a repeated pounding so that the egg,parotta and the onions mix well.

Serve hot with any of your favourite side dish. I loved it without any.

Note: The Kothu parotta made in streets, will have some more spices and also a sauce to it. Since it is a home made version, we had to cut on these spices and sauce, mainly because my husband did not know where I kept them in my kitchen ;)

You can also do chicken kothu parotta, meat kothu parotta, the same way and adding more spices to the recipe.

I hope every married women would have had an experience like this. Sharing can be fun. Did you know your husband cooks? Waiting to hear your stories.

8.25.2008

Vermicelli (Semiya) Upma with Coconut Chutney

Vermicelli (Semiya) is is a type of pasta, round in section and somewhat thinner than spaghetti. Vermicelli is most commonly used in Asia for preparing various recipes. To name a few, Vermicelli Pulao, Vermicelli Upma, Vermicelli Kheer (Payasam) etc.

Upma is a Tamil word which is Uppu(Salt)+Mavuu (Any type of flour). A recipe made with any type of flour is basically called Upma. We can use Vermicelli(Semiya) to prepare this upma.

Vermicelli(Semiya) upma is one easy to prepare Tiffen item, often made in India. This recipe can be prepared in 10 minutes. This quick and tasty vermicelli(Semiya) upma can be prepared with or without vegetables. I am sharing the simplest version of vermicelli upma which can be altered according to your creativity.

To prepare a basic vermicelli upma you will need,

2 cups of Vermicelli (Semiya)
1 1/2 cup of water
2 tsp of ghee(Clarified butter) or oil
1 tsp urad dal
1 tsp channa dal
1 tsp mustard
1 oinion chopped lenghtwise
2 green chillies
Salt to taste

Method:

First of all to prepare this vermicelli upma, you have to fry the vermicelli in ghee or oil for few seconds until they turn light brown. Doing this is very important for getting the texture of the recipe right. If you don't fry them, then the upma will have lumps which will spoil the look and taste of the recipe. The fried vermicelli looks like what is shown in the below picture.


Now in a pan, heat 2 tsp of oil, add mustard. When it pops, add urad dal and channa dal.

Add the chopped onions and green chillies and saute them for few seconds

Add the water and salt and let it come to a boil.

Add the fried vermicelli and cook it in a Sim flame.

Within minutes the vermicelli will get cooked. Just be careful so that you do not burn the lower part of the upma.

Variation: You can add vegetables of your choice and make a vegetable vermicelli upma.

Serve hot with your favourite chutney/side dish. I like them with coconut chutney, the recipe of which is given below.

Ingredients for coconut chutney:

20 grams cashew nuts
1 piece chopped ginger
1 springs chopped coriander
2 piece chopped gr chilli
1 tbsp cumin
1 springs Curry leaves
1 cup grated coconut
1 pinch hing/Asafotida
1 tsp mustard
2 tbsp oil
3 piece red chill
1 pinch salt
1 pinch tamarind or lime
1 tbsp urad /wash -black gram

Method:

Mix the coconut, ginger, green chilli,coriander in a blender.

For tampering : In hot oil add mustard , red chilli ,cumin,urad dal, hing , curry leaves and a 1 tsp of lime juice.

Serve it with any tiffen item of your choice.


I am sending this Vermicelli (Semiya) upma and coconut chutney for
WBB- combi breakfast hosted by dear Latha.

8.21.2008

Falafel with Pita bread, wow its Arabic!

It was during April'07, when we first stepped into our apartment in Chicago. My first US visit. I was all excited to spend my life as a full time homemaker. Not all will love this position. Though cooking at home is what we prefer, we love to experiment new cuisines. Food is our passion. My husband is a great food critic. Even now sometimes he is the one who checks for salt in my recipes! Though we entered US in April, we did not have car till September'07 and you know how life is in US without cars! You are literally handicapped without car in US, at least in Chicago.

Without cars we could not go out often. But, luckily we had few restaurants at walkable distance from our apartment. One of those was 'The Pita Inn' - An Arabic restaurant. Initially I was skeptical to try any food there because one of my friend had a bad experience with Arabic cuisine. But, my husband was very determined to have dinner there. He convinced me and off we went there walking. It sure was a good exercise!


As I am a vegetarian, I had only one option in the menu to order. My husband decided to be a vegetarian for that night and so we ordered 2 plates of ... yes! Falafel duh! If it was not for Falafel why am I saying these stories of mine. lol! Anyway, from that day I have become a great fan of Falafels and Pita bread and have always wanted to try it at home. Since then I had searched for Falafel recipes and finally here it is, for you to experiment at your home!


When zlamushka announced T&T this month, I know what I had to prepare. Yes! the tasty Falafel! Jugalbhandi is really a very good place for food lovers. They inspire to cook and I have already sent in my Rajma salsa for T&T. This is my second entry. Though my picture of falafel with pita bread is not as luring as theirs(they are the click gurus!), I am sure it will at least be a picture which captured my love for the food.


I tried baking them but as the Jugalbandits said, it was a little dry but tasted good. We both liked the deep frying part! oil, oil and more oil! sometimes you have to do sacrifices for your tongue!


I am also sending this entry to


Ruth's Bookmarked recipes event.


Madhuram's Your Recipe rocks!

7.31.2008

Baked/Fried Vegetable Cutlet and an update


It has been months that I have prepared this vegetable cutlet. It is one of my hubby's favourite. Though previously, I used to deep fry it oil, this time I tried baking it. Initially I was skeptical about baking, as I am still learning as a baker. Seeing a lot of bakers and their blogs I got inspired and decided to bake it. I was lucky! The Vegetable cutlet turned out to be very tasty and great looking.

With no further delay, here is the recipe of Baked/Fried Vegetable Cutlet

Ingredients:

1 cup of vegetables which includes Beans, carrot, Peas, cauliflower, Potato
1 tbsp of chick peas
1 tsp of chilli powder
Salt to taste
1/4 cup of cilantro, finely chopped
1 tbsp of cashew nuts (optional)
1 tsp of coriander powder
1 tsp of cumin powder
1 tsp of cumin seeds
A pinch of Hing
1 tsp of Ginger garlic paste
Oil for deep frying. If baking, you will need 2 tsp of oil to prepare the mixture.

To dip:

A thin mixture of 1 tbsp of all purpose flour and water.

To Coat:

1 cup of bread crumbs

Method:

Pressure cook all the vegetables and chick peas till you get 3 hisses.

Immediately release the pressure and remove the vegetables from the cooker.

Separate the potato alone and peel and mash it in a bowl.

Place all the other vegetables in a tissue paper and squeeze to remove excess water.

In a Pan, add oil, cumin seeds and saute them. Now add ginger garlic paste and cashew and saute.

Add the vegetables and mix well. Add chilli powder,turmeric powder,cumin and coriander powder and mix well. Now add salt.

Saute them until the water is evaporated.

Now add this mixture to the mashed potato along with finely chopped cilantro and mix well.

Take small amount of this mixture and make it into a cutlet shape, it can be round, oval or heart shaped and dip it in the all purpose flour and water mixture and immediately coat them with bread crumbs. This step needs to be done very quick so that we can prevent the cutlets from absorbing more water.

To Bake the Vegetable cutlet:

Preheat the over to 375 degree F and Place these cutlets in the baking pan for 15 -20mts.

Now remove the pan and turn the cutlets and bake it for another 15 mts.

Remove and serve hot with Chilli/Tomato sauce.

To Fry the Vegetable cutlet:

In a Pan, add enough oil and deep fry them until they are brown.

Serve hot with Chilli/Tomato sauce.

Note: In either case, make sure that the cutlet mixture has less moisture it in. This will help in getting a crispy vegetable cutlet.

Regarding the Update:

I am very happy with the overwhelming response to the Eat Healthy Protein rich contest. I have totally received 170 entries which includes 2 of my own entries. I am currently working on the round up and will soon post the mega round up. Also I have a winner whose blog will be featured in my blog for a month. I will reveal the details of this winner in my round up but as of now just wanted to share that she has sent me 27 entries. Keep guessing...

As for the winner of $20 gift card, I will select the top 5 recipes ( The number may increase as I find many interesting recipes) and you all need to vote! These recipes will be selected based on the uniqueness and the amount of protein content and also originality. The voting poll will be open soon in my blog. Come back to get more details on the round up.


A VERY BIG THANKS TO ALL OF YOU WHO HELPED ME MAKE THIS CONTEST A GREAT SUCCESS!

I will be posting the topic for next month event asap.

7.25.2008

Masal Dosa - A famous South Indian Dosa variety

Dosa, a very famous South Indian recipe, can be served for breakfast or for Dinner. Mostly, it is preferred during breakfast, but in some houses like us, we eat tiffen for dinner and hence these dosas become part of dinner too. Most of the Non-Indians, to my knowledge, are aware of this recipe, but still there are a few who are new to this dosa. There are many variations of dosa. At this time I must say about the Dosa mela hosted by my dear Srivalli. Here you can find humongous varieties of Dosa and how they are made.


The Basic method of preparing Dosa is the same but with slight variations, we can do wonders with this recipe. To make Dosa all you need is the Dosa batter. This is really easy to prepare. I will write a detailed post on preparing Dosa and Idly batter soon. But for now, you just need to know that for this dosa, the batter is prepared by soaking 3 cups of Rice and 1/2 cup of Urad dal and grinding them and allowing them to ferment overnight.


Coming to Masal Dosa. This is a widely served breakfast in India. Many kids love to eat this, as the masal will be placed inside the dosa and when you eat the dosa with the masal, it does gives you a different yet tasty flavour. For masal dosa, all you need is Masal along with dosa.(Duh!)


For preparing the masal for masal dosa you need,

1 cup potato, cooked,peeled and mashed
1 cup onions finely chopped
1 green chilli
1 tsp of chilli powder
Salt to taste
1 tsp of turmeric powder
1 Garlic flake (optional)
Few cilantro finely chopped
Fried Cashew (optional)
2 tsp of oil
1 tsp of lime juice
1 tsp of mustard
1 tsp of cumin seeds
A pinch of hing
1 tsp Urad dal
1 tsp channa dal

Method:


In a pan, add the oil and allow the mustard seeds to splutter. Then add hing and cumin seeds.

Add urad and channa dal and saute them.

Now add the onions and saute them. Add the green chillies, fried cashew and garlic and saute them.


Add chilli powder,salt, turmeric powder and mix well. Add little water so that these spices are not burned.


Add the mashed potatoes and mix well. Garnish it with cilantro.


Add 1 tsp of lime juice, mix and switch off the stove.


For masal Dosa


Prepare the dosa by taking small amount of the batter and spread it in the Tawa/grill in a circular shape (or your favourite shape) and cook it with few drops of oil or ghee until golden brown.


Place this masal inside the dosa, fold it and serve hot with chutney or sambhar.


Here it is the lovely Masal Dosa ready to eat!


7.17.2008

Arisi Upma - A great tiffen with raw rice


This upma with raw rice is my favourite. It is called Arisi upma and it is a very well-known tiffen item in south India. The preparation is very simple and this dish is delicious with coconut chutney. However my favourite side dish for this food is tomato chutney.


Ingredients:


Raw Rice (Pacha Arisi) - 1 cup
Onion 1 cup (optional)
whole black pepper - 1tsp
Channa dal 2tsp
Red Chillies 3 to 4
Mustard Seeds ½ tsp
Cumin Seeds 1 tsp
Curry Leaves
Hing (Asafoetida) 1/4 tsp
Salt to taste
1 tbsp Oil


Method:

It is advised to soak the rice for 4 hrs and dry them in hot sun before grinding. However, I do it without this step. Either way it tastes great. But, if you want to follow the correct way of doing this dish, I would suggest you to dry the rice before using it for this preparation.

Coarsely grind the rice and the whole pepper it in a mixer/blender, little by little so that all the rice are evenly broken.

You can either do this with pressure cooker or you can also use a heavy based vessel or kadai.

Heat the oil in the vessel and add mustard seeds, cumin seeds, red chillies, channa dal, hing and curry leaves.

Then, add the onions and saute them well until the onions start changing colour.

Add the coarsely ground rice and saute for a minute.

Pour 3 cups of water and add salt and stir well.

When the water starts boiling you can either off the stove and transfer the contents the pressure cooker or you can continue to cook in the same vessel in Sim flame.

If you choose to use the vessel to cook, make sure that you watch at regular intervals and stir occasionally so that the food doesn't get burnt.

If you choose to pressure cook, then wait for 4 whistles. Switch off the stove and allow it to cool.

Serve hot with your favourite side dish.

5.28.2008

Onion Roti recipe


I was thinking of what to cook for lunch yesterday. Roti again? I was wondering how I can prepare roti differently. Then remembered 'Roti mela'. Wow! how many varieties of roti till now...amazing..thanks Srivalli for conducting such a useful and fun event. So here is my onion roti. A simple variation from the normal roti preparation. I found it very tasty and this goes to Srivalli's Roti Mela.

Ingredients:
1 cup wheat flour
water to prepare dough
salt to taste
1 onion finely chopped
1/4 cup of cilantro finely chopped
2 green chillies finely chopped
A pinch of hing
2 flakes of garlic finely chopped
1-2tsp oil

Method:

In a bowl, mix all the ingredients. Add water little by little and knead the dough.

This is same as that of a normal roti preparation.

Now, as usual take a small round ball of dough, roll it to whatever shape you want and cook it on both sides with the help of Tawa/griddle.

Serve hot with side dish of your kind.

5.23.2008

Dhokla - A Famous Gujarati Fast Food

I don't know, but for some reason I have been doing Gujarati food for the past two days. Yesterday I made Kachori and today Dhokla. Both are my favourites. Both are easy to make and very delicious. Dhokla, a famous Gujarati fast food, is my husband's favourite. This food can be eating as snack or even for dinner. It does fill your tummy! Dhokla is a steamed food and you can make it either in Suji or with besan or with channa dal. Though the authentic Gujarati recipe for Dhokla involves fermentation and channa dal, I tried the suji version yesterday and will share the recipe with you all. I will try to post the channa dal version of Dhokla soon.

Ingredients:

1 cup suji/Rava/Semolina
2 Green chillies finely chopped
1/4 cup cilantro finely chopped

Salt to taste
1 cup plain yogurt
A pinch of eno salt

For Garnishing:
1 tsp oil
1tsp mustard seeds

1 green chilli
1tsp urad dal
1tsp channa dal

A few chopped cilantro

Method:

In a bowl, Mix suji, salt,yogurt,eno salt,green chillies,cilantro and mix well. Add little water and make the batter to the idly batter consistency. Rest the batter for 30 mts.

Now using a cake pan or thali, steam this mixture for
about 10 to15mts. Check regularly to confirm that the inside of this dhokla is cooked properly as you check when you bake a cake.

Note: You need to grease the cake pan or thali with some oil so that the dhokla comes out without sticking.

Let the dhokla cool for some time. After it is cooled, remove the dhokla from the vessel and place it in a plate.


In a pan, add oil, mustard seeds. When the seeds pops, add urad dal,channa dal, cilantro and green chillies.

Add this mixture on the steamed dhokla and cut them into desired shape and serve hot with Mint Chutney!


NOTE:
You can also use idly steamer to cook this dhokla. Instead of the Idly plates use a flat bottom vessel and place it 10-12cms
above the water level.

I am sending this to the SWC- Gujarati Cuisine event. This month it is hosted by Priyanka of Asankhana.

5.22.2008

Kachori - An authentic Gujarati Appetizer/Snack


Kachori, an authentic Gujarati recipe, is a very famous snack in Northern India. I have had kachori many times in my friends place and every time this food tastes awesome. It is very easy to make and very creative too. It is basically a stuffed snack. So you can show your creativity in the stuffing (as usual). You can make Kachori in many different ways and one of them is what I'll be sharing. Now for the recipe.

Ingredients:

For the dough
1 cup of All purpose flour (maida)
1 tbspn of suji/Rava - Mix this suji with warm water
1 tbspn of ghee/oil/vanaspati
Salt to taste

For the stuffing
Beans - any kind I used Rajma, you can use any beans.
A pinch of turmeric powder
1 tsp of cumin seeds
Salt to taste
2 tsp of sugar
1 tsp of coriander powder
2 green chillies
1/4 cup cilantro

Method:
Mix suji with warm water. Prepare a soft dough (more like poori dough) by mixing maida, salt, ghee and suiji water. Rest it for 15 -20 mts.

For the stuffing, boil the beans and grind it along with green chillies and cilantro to a coarse mixture.

In a pan, add 1 tsp of oil, cumin seeds. Add turmeric powder and ginger garlic paste.

Now add the blended mixture and saute them in a medium or Sim flame till all the moisture is evaporated. This will take around 5 to 10 min.

Add coriander powder, salt and sugar and mix well. This addition sugar gives instantly the Gujarati flavour.

Now, take a lemon size ball from the dough. make it flat in your palm and press the edges so that it becomes like a cup so that you can place the filling inside it.
Carefully close the cup and squeeze the leftover dough (similar to kozhukati) and make it to a round ball.

Deep fry it in oil and serve hot with Mint chutney or chutney of your choice.
You can even stuff it with sweet (poornam) and enjoy!


I am sending this to the SWC- Gujarati Cuisine event. This month it is hosted by Priyanka of Asankhana

5.16.2008

Plain Paratha recipe


'Paratha, one of the most difficult and time consuming recipe'- This was what I was assuming before trying out this easy recipe told by my Friend. Generally, parathas will have layers and kind of time consuming process. But,this recipe is very easy and even beginners can make wonderful and tasty parathas.

Ingredients :
2 cups of Wheat flour

Salt to taste
3tbspn Ghee/Melted butter
oil and Water to knead dough

Method :

Mix wheat flour ,2 tsp ghee, salt & Required water to make a dough consistency.

Rub oil over & knead it soft .

Let it rest for an hour. The more it rests, the more the parathas will be softer.

Take a small amount of dough and roll it with the help of the roti roller. Apply some butter/ghee to it . Fold into two again fold the same.Start rolling to form a triangle or any shape you want.

The main thing is, you need to roll and fold for at least 3 to 4 times.

Heat a tawa or flat pan or griddle ,when it gets hot, add the paratha & let it cook for a minute. Now turn around & add a small tsp of ghee/oil around the paratha and cook for a minute. Now the paratha puffs up. Turn the other side and cook for 1/2 minute.

When you are sure that both the sides are cooked serve hot with Channa Masala or any other side dish of your choice.