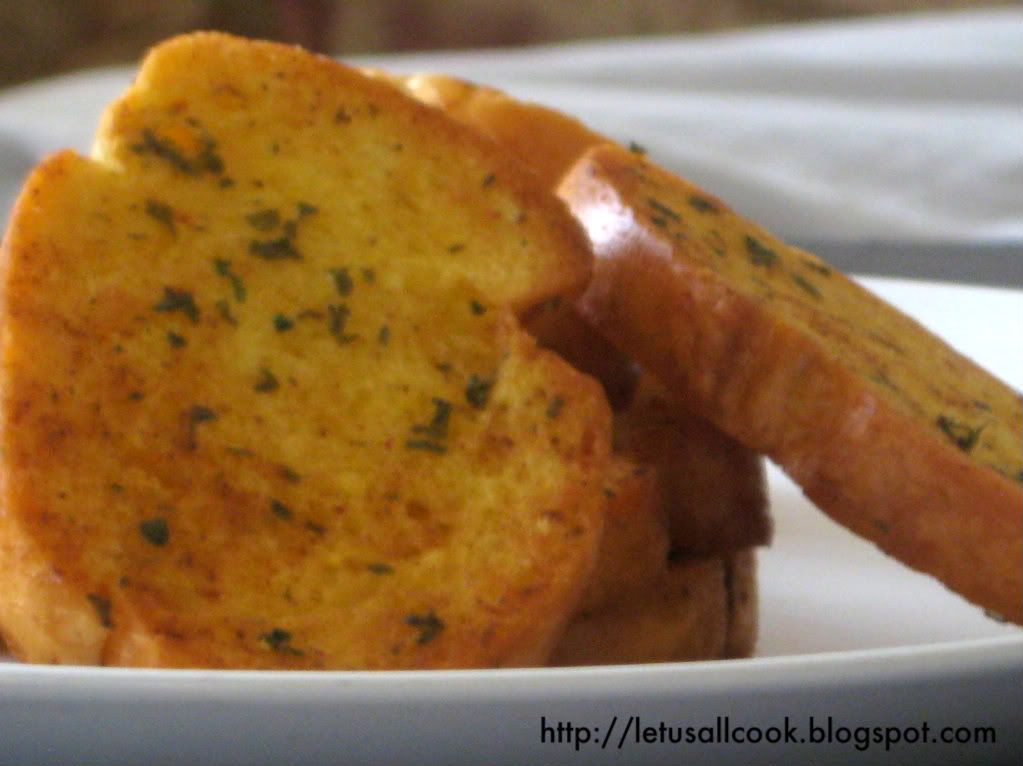
Garlic Bread- The most Luring Bread Variety

Garlic bread is a great appetizer. This a very easy and simple way to make your own.

Pasta in chilli Sauce

Pasta has become a weekly dinner for us. This is yet another very easy and quick to make Pasta recipe.

Coconut Cookies

A Yummy delight. Easy, simple and delicious cookies make at home within minutes.

Capsicum Rice - Must try!

Capsicum + Rice = Delicious! , A must try vegetarian healthy recipe.

Healthy Spinach Rolls

Easy and healthy snack ,the kids will love.

SUBSCRIBE via RSS
What is RSS?

OR SUBSCRIBE Via email:
Showing posts with label Bake. Show all posts

1.14.2013

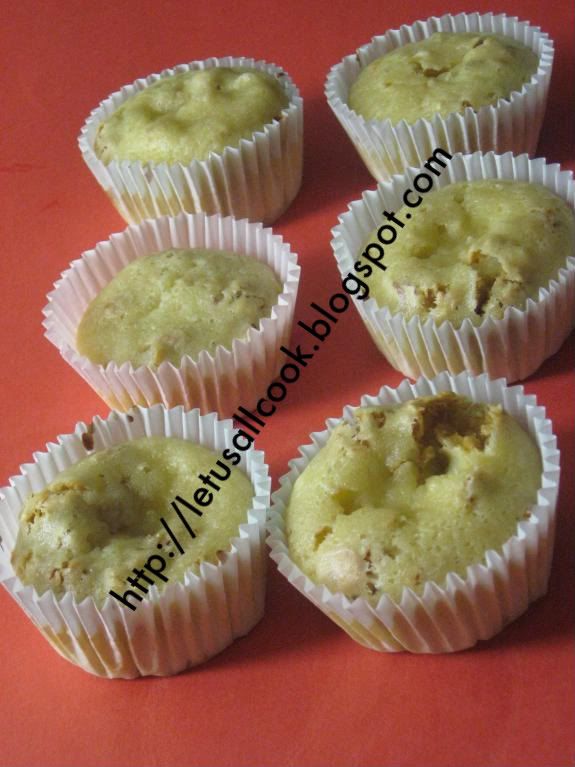
Baked Banana flower(Vazhaipoo) vadai


I love vadai and hate vazhaipoo. So, the right thing to do is to make vazhaipoo vadai. And if it is healthy, what else you need from a snack? Ta da! Here is a recipe for Baked Vazhaipoo vadai. A simple and easy recipe which is healthy and at the same time doesn't compromise on the taste. Most of the time, if you say that a dish is healthy, you would surely have to compromise on taste. But, this is different. You have taste and you can take care of your health.

Here comes the recipe for Baked Vazhaipoo Vadai (Banana Blossom), a healthy twist on the traditional deep fried version.

Ingredients:

Vazhaipoo / Banana blossom - 1 - Cleaned
Chana dhal - 1 small cup - Soaked for 2 hrs
Onion - finely chopped - 1 cup
Ginger Garlic paste - 1 tsp
Cilantro/Coriander leaves - a handful
Fennel seeds - 1/2 tsp
Cumin powder- 1 tsp
Coriander Powder - 2 tsp
Green chilies- 1 finely chopped
Red chilies - 3
Turmeric powder - a pinch
Salt - to taste 
Oil - 1-1/2 tbsp

Method:

Preheat the oven to 400 F/200 C. 

Line a baking sheet with aluminium foil and spray with oil. 

Either steam the cleaned banana blossom until soft or you can cook them in  boiling water for 2 to 3 min.

Grind the soaked channa dhal in a blender with red chilies,  fennel seeds,cumin and coriander powder, turmeric powder and salt. 

Do not add water and grind it to a coarse mixture.

Add the cooled banana blossom to the  blender and pulse until everything is combined. 

Transfer the mixture to a big mixing bowl and add the onion, green chilli, garlic, chopped cilantro and oil. Mix well. 

Take a tablespoon or two size mixture and make balls.

Place over the foil and flatten it. 

Place all the balls with 1 inch gap between them.

Bake in oven for 30 to 40 mins, flipping once in between.
11.28.2008

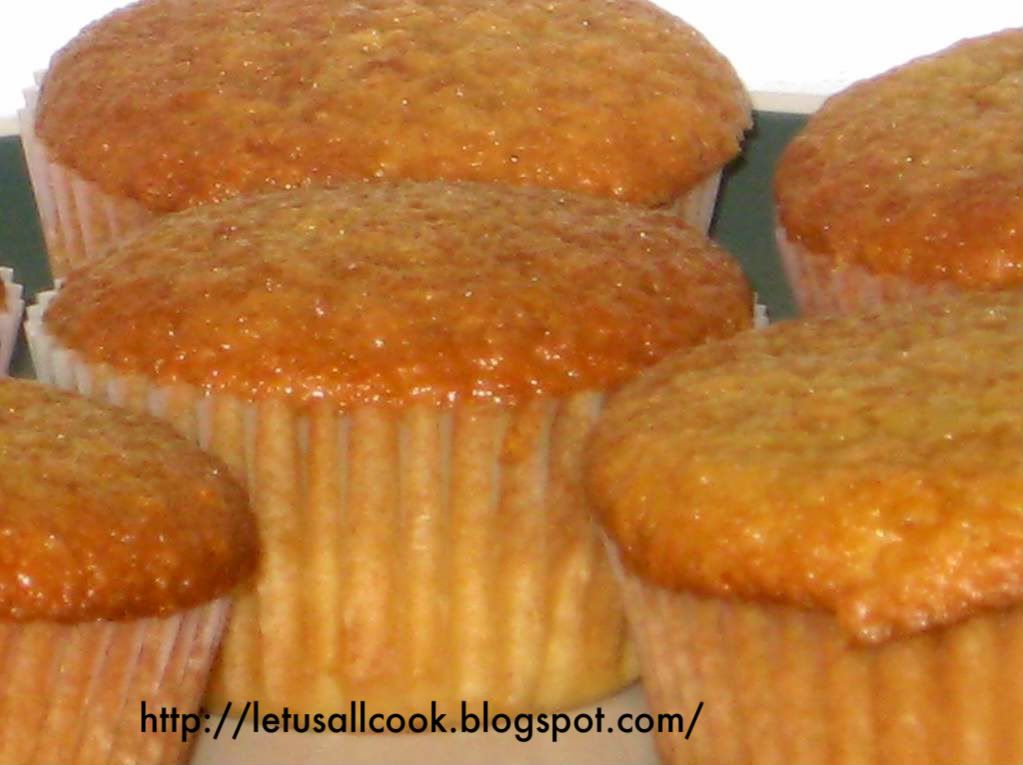
Granular Oats Muffin - Healthy choice!

I always wanted to try Muffins and Cupcakes. I did try cupcakes a couple of weeks back but Muffins, very recently. I always got confused with muffins and cupcakes until recently found their difference (you can find it in my classical cupcake recipe). So Muffins huh? What else can I add with the regular muffin dough? May be oats! Granular oats!

Granular Oats Muffin

I just wanted to make my muffins healthy. Already I did not use Butter in its preparation so now adding oats gave me a satisfaction that it is healthy someway or the other. I poured only 1/2 of the pan, so my muffins didn't come out fluffy but it tasted real good.

Ingredients:

1 medium egg, beaten.
2 cups of flour
3/4 cup of milk.
1/2 cup of granular oats
1/2 cup of sugar.
1/2 cup of oil, if you want you can use butter too
3 teaspoons of baking powder.
1/2 teaspoon of vanilla extract.
1/8 teaspoon of salt.

Oats Muffin - Healthy Breakfast recipe

Method:

Mix together the egg, milk, oil and vanilla extract.

In another bowl, mix together the flour, sugar, baking powder,salt and granular oats.

Since the granular oats has raisins, it comes out with good taste.

Mix the two mixtures.

Fill 3/4 of a muffin pan with the dough and bake at 390F for about 15 minutes.

Allow it to cool and serve with tea/coffee for breakfast.

10.17.2008

Witch's Broomstick- Halloween Cookie Recipe

Oh Yes! These are the cookies I tried few weeks back and failed miserably! You all know the outcome. Yes, the Table Tennis Bat cookies. I still couldn't figure out what went wrong. May be that was not my day! Anyways, I really wanted to share this recipe with you all.

When I read about these cookies in the Woman's Day Magazine (Halloween Celebrations), I was determined to share this Broomstick cookies recipe. But, unfortunately my first trial was a ... (you can fill up whatever you want).

These cookies looked so cute and yummy and tempted me to try again!And so I am going to make these for my friend's Halloween Party! yey! I am all excited. Hope this time it comes out well.


Picture courtesy: Woman's Day (Halloween Celebration) 2007 Magazine.

May be we can get some small witch dolls and make them sit on these cookies. wow! it will look so cute! wont they? It is a simple Halloween cookie recipe which sure will be a hit among kids.

Ingredients: (Makes: 36)

1 bag peanut butter cookie mix

1/3 cup all purpose flour

1 bag of Pretzel sticks

1 tube of Icing (Decorating frosting) of any colour


Method:

Preheat the oven at 375 degree F.

Prepare the cookie mix according to the package direction with the addition of the flour.

Divide it into 36 small portions.

Shape the dough pieces into small triangle of 1/4 inch thick.

Arrange these in the cookie sheet with 2 inch apart.

Insert the pretzel to one end.

Take a fork and press it on the dough to make broom bristles.

Bake for 12 to 15 min.

Cool the cookies and decorate it with the frosting.

Broom Cookie is ready and now we need to wait for the witch to show up! Easy huh?

The mistakes I made the first time baking these Broom cookies:

The dough was very lose so it did not stand properly in the cookie sheet

I did not have pretzel that time so I tried making the stick with the dough itself which was an absolute blunder!

I made them too thin so it was very crispy and broke easily.

Tip:

If the bristles doesn't come properly with fork then don't worry. Bake them and draw them with the frosting. Either way they will look so cute.

If anyone try this Broom cookies, please let me know. I am kind of sentimentally attached to this cookies!

10.16.2008

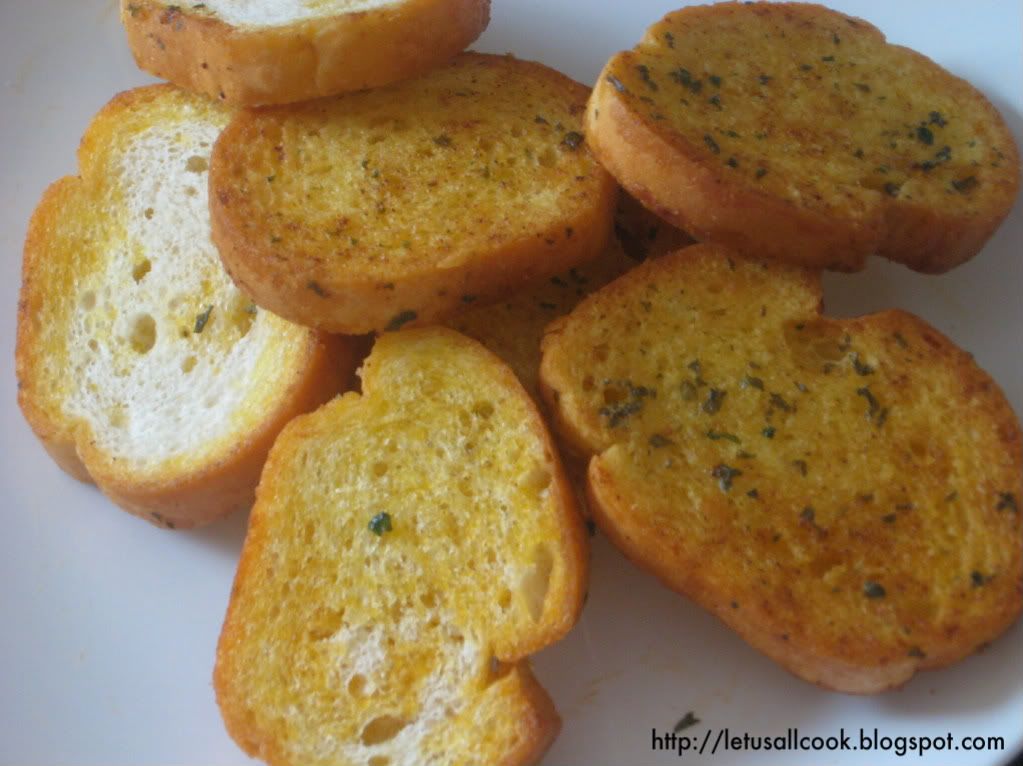
Garlic bread Recipe - The most luring bread variety

Whenever we hit the Pizza hut or any Pizza place for that matter, the first thing I order is Garlic bread. I love Garlic bread as an appetizer. I can eat it all day long if my stomach co-operates without making me sit in the toilet for the next couple of days. I have browsed for many Garlic bread recipes-easy ones, difficult ones. But the recipe which I am going to share is 'The one', at least for me and my family.


Garlic Bread

When I placed these breads in the oven, I was praying that it must come out well. And by God's grace or should I say I was lucky? huh, either way I am very happy to share this Garlic Bread recipe with you all.

Ingredients:

1 16-ounce loaf of Italian bread (Any bread is fine I guess)
1/2 cup (1 stick) unsalted butter, softened
4 large cloves of garlic, smashed and minced
1 tbspn freshly chopped parsley
Salt to taste
Pepper to taste

Garlic Bread

Method:

Preheat oven to 350°F for 10 min.

Mix the butter, garlic, and parsley together in a small bowl.

Add Salt to taste.

Make 1-inch thick slices into the bread.

Put a teaspoon or two of the butter mixture between each slice.

Wrap the bread in aluminum foil and heat for 15 minutes in the oven.

Garlic Bread is ready. Cool it for 5 min and dig in!

Garnished the Garlic breads with Red chilli flakes OR pepper before serving.

Best when hot. But can be refrigerated and reused.

I am sending this recipe to World Bread Day'08 hosted by Zorra.

10.14.2008

Monster cupcake - Another Halloween Dessert Recipe

Whenever I hear the word Monster, I get reminded of my Monster Cookie. Oh! how funny! I will never forget that experience. But, this time, it was a decent outcome. My Monster Cupcakes looked like a monster! Ha! What an achievement. I made a Ghost cupcakes too!


You will need,

Classic Cupcake recipe as a base to prepare the cupcakes.

Orange Icing for the background.

White Icing for eyes and teeth.

Black Icing for the eyebrows.

Red icing for the lips and pupil.

Refrigerate it for 30 min before serving as Halloween Dessert.

It is one of my first Icing arts so you might find flaws here and there. But hey! it looks like a monster doesn't it?

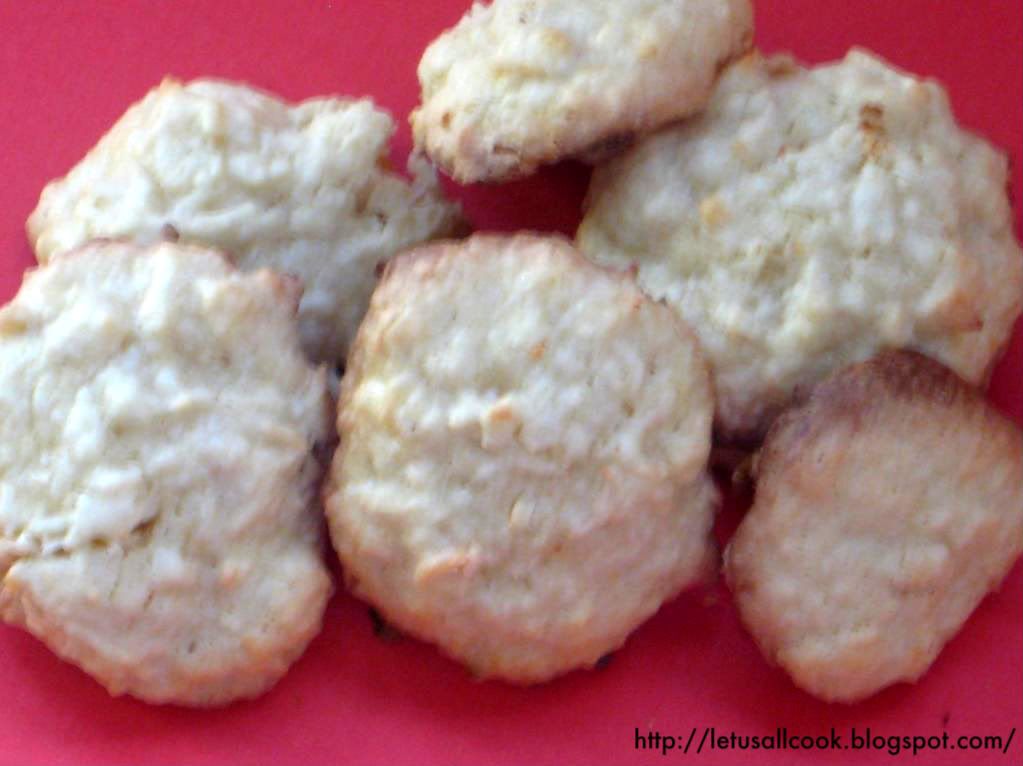
Coconut Cookies Recipe

I love the coconut biscuits sold in the shop near my house in India. They are the best cookies I have ever tastes. Chewy and tasty! Recently I came across a coconut cookies recipe in a book and I wanted to try that and see if it tasted like the one which I used to love.


What the heck? I have my husband to eat whatever I cook. Poor guy he has no choice. I know I am not going to lose anything for trying. I have become somewhat skeptical after my Monster cookie experience. But, that is never going to stop me. And I am happy that I tried. These cookies came out perfect and my husband loved them too. Hey, after all the hard work we put in, a kind word of appreciation especially from our husband is what we need. Isn't it?

Here is the Coconut Cookies recipe for you,

Ingredients:

1 cup of all purpose flour
1/2 cup of butter
3/4 cup of sugar
2 tsp of vanilla essence
1 egg OR 1/4 cup silken Tofu
1/4 cup of grated coconut (fresh or frozen)
1/2 cup of Sweetened coconut (especially used to bake)


Method:

Preheat the oven at 375 degrees for 10 minutes.

In a bowl, beat the eggs for 2 min in high and 1 min in low. Now add sugar and beat well.

Add butter and vanilla essence and mix with the help of a beater for 1 min.

Add both the coconut and mix well till the coconut is coated with the dough.

In a baking sheet, place a spoonful of dough.

Do not flatten the dough. Make sure that they do not have any particular shape. This really helps as the coconut will give a dimensional look to the cookie.

Bake it for 10 -12 min at 375 degrees.

Remove it from the oven, cool it and remove it using spatula.

Store it in an air tight container and enjoy!

10.13.2008

Ghost cupcake - A Halloween Dessert Recipe!


I am learning a lot about baking now a days. It is a mesmerizing art for sure. Once you get into it and if it has clicked for you once, you will never quit baking. Though I had my initial baking failures, these Halloween cupcakes came upto my satisfaction.

How can you not have a Ghost for Halloween? So I made these cute Ghost Cupcakes. Hope you like these. These are one of my first Icing arts so you might see some amateur mistakes. But I like them a lot and they tasted truly divine.

The Ghost said 'Boo!!! Do not eat me or I will scare you to death' and we Booed back and ate him with a smile.


You will need,

Classic Cupcake recipe as a base to prepare the cupcakes.

Orange Icing for the background.

White Icing for the ghost.

Black Icing for the eyes of the ghost.

Refrigerate it for 30 min before serving as a Halloween Dessert.

10.12.2008

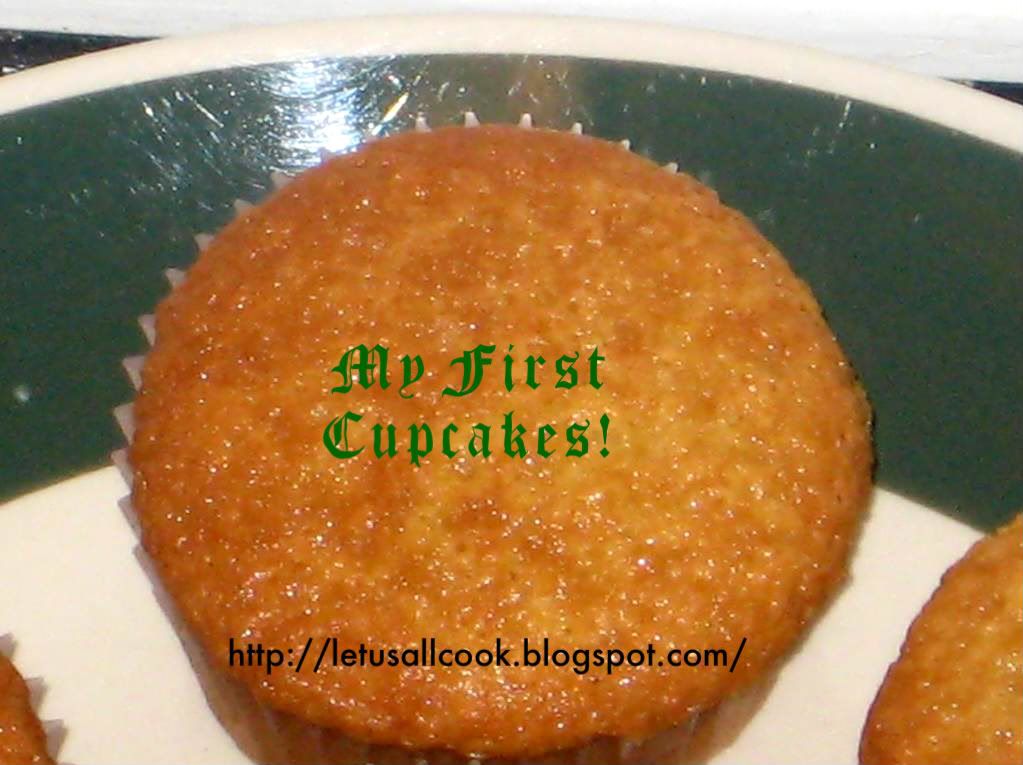
Classic cupcake Recipe - A simple and easy way to bake!

Classic cupcake recipe
This is the first time I am baking Cupcakes. I wanted to bake them but I did not have the cupcake pan with me. Last week I made it a point to this cupcake pans so that I can make these cute little cupcakes and decorate them for Halloween.

Cupcakes are cute. They are little and make me feel like a kid when I eat them. This classic cupcake recipe is the base for many variations. I tried a few decorations on these cupcakes for Halloween which I will be sharing soon.

I have always wonders if Cupcakes and muffins are the same. But my recent research has taught me that there is a difference. To put is simple, Cupcakes are miniature cakes and Muffins are breads. Cupcakes are usually prepared for an special occasion and have icing on them. Whereas, Muffins are eaten for breakfast and generally has a fruit in it. Example Blueberry Muffins,Strawberry Muffins.

Coming to the Classic Cupcake recipe.

Ingredients: (For 12 cupcakes)

1/2 cup butter, softened
3/4 cup sugar
2 eggs
2 tsp. vanilla extract
1-1/2 cups all-purpose flour
1/2 tsp. baking powder
1/4 tsp. salt
2/3 cup milk

Classic Cupcake Recipe

Method:

Preheat the oven to 350 degrees F for 10 min.

Line your cupcake pan with paper or foil liners.

In a bowl, beat the butter and sugar together.

Add the eggs, one at a time, beating well after each addition.

Add the vanilla extract.

Now add the flour little by little mixing it well with the beaten mixture.

Add the milk and mix well.

Pour into the prepared cupcake pan and bake for 25 minutes, or until an inserted toothpick comes out clean.

Note: Pour so that it fills only 3/4 of the cup as the cupcakes will raise.

Your Classic Cupcake is ready. Cool it for 5 to 10 min before doing any decorations. You can store it in an air tight container and refrigerate it. It tastes awesome the next day.

10.08.2008

Tabble Tennis Bat Cookie - An outcome of my Halloween disaster!

If you had read my Halloween baking experience, you pretty much know how this table tennis bat cookie got its life. Though my initial attempt was a failure, I am happy that at least I ended up with these cookies. Hey I tried! And Thanks to all those who commented and encouraged me to try more! All my foodie friends wanted to see how the outcome was. With no further adieu, here are my Halloween broomstick cookies turned into Table tennis bat cookies.


If you ask me how it tasted? I would say, ok. It was edible! Crispy though.


Ingredients:


1 cup of all purpose flour
1/2 cup of butter
1 cup of sugar
2 tsp of vanilla essence
1 egg OR 1/4 cup silken Tofu


Method:

Preheat the oven at 375 degrees for 10 minutes.

In a bowl, beat the eggs for 2 min in high and 1 min in low. Now add sugar and beat well.

Add butter and vanilla essence and mix with the help of a beater for 1 min.

In a baking sheet, place a spoonful of dough. Spread the dough in oval shape with the help of the spoon.

Take some more dough and place it like a handle to the bat. Like a straight line attached to one end of the oval shaped dough in the sheet.

Make these small bats with 1/2 inch gap from each other, as they will expand.

Bake it for 10 -12 min at 375 degrees. Mostly, the cookies will be done within 10 min.

Remove it from the oven, cool it and remove it using spatula.

Store it in an air tight container and enjoy!

If you have icing, then you can make the net for this bat and turn it into a tennis bat! How creative!

You can make these with your kids. They will enjoy this and will be a lot of fun! Of course it is no way related to Halloween themes, but you can do it when you r kid stood first in sports or simply because you wanted to try something out!

9.15.2008

Strawberry Apple Almond Cookies - A simple and easy cookie made from Leftovers!

And finally! Here is my recipe for Strawberry Apple Almond Cookies. I made these with the left over apple cookie dough. I have never seen strawberry and apple combo in cookies. The apple almond cookies were really tasty. I had left out with a little amount of dough which would make me around 6 more cookies. But, when I opened the fridge I had some strawberries that needed to be used asap. I don't know why but strawberries in my fridge get spoiled very quickly!

Cookies

So here I go thinking of what to do with this and suddenly became brave enough to try out this combo. I was 100% skeptical with this idea. I was worried if the cookies will be more fruity/ very sweet. Not sure of the taste. But, what the heck, my cookies, I am going to eat. With that encouraging thought, I started chopping strawberries.

Half an hour later, I was digging into those lovely cookies watching my favorite TV show on the Internet! Ya, life without a TV sucks. But hey we have Internet - the life saver! I was very impressed with my decision of making these combo cookies. No regrets. They were extraordinary. Even better than the apple cookies, I would say. Sometimes, these trials become a mega hit. With this pride, I am sending this recipe to Original Recipe event and also to Hima's Sunday Snacks.

Ingredients:

2 cups all purpose flour
1 cup peeled and finely chopped apple
1/2 cup strawberry, grated
1 tsp baking soda
1 cup butter
1 tsp vanilla extract
1/2 tsp salt
1 cup sugar
1 egg OR 1/4 cup Silken Tofu
1/4 cup Almonds

Strawberry and Apple Cookies

Method:

In a bowl add the silken tofu, butter and sugar and mix them well.

1/4 cup blended silken tofu = 1 egg. Whiz in a blender until completely smooth and creamy, leaving no graininess or chunks.

Now add baking soda,salt,flour, vanilla essence and mix them well.

You can grate the apple after peeling or you can also blend it without adding water.

Add apple,grated strawberry and chopped almonds. You can use a blender to chop almonds too. But be careful not to make it powdery.

Preheat the oven to 375 degree F for 10 min.

In a cookie sheet, place the dough in whatever shape you want and bake them at 375 degree F for 12 to 15 min. Mostly 12 min is enough.

Allow them to cool for 5 min and then store it in an air tight container and enjoy!

Egg lovers you still can make these Strawberry Apple Almond cookies with eggs. For making these cookies with egg, you just have to beat the eggs with sugar and butter until they blend well and all the other steps are the same.

9.14.2008

Eggless Apple Almond Cookies


Sometimes when you try something new and if it is a hit, you really feel proud. I am writing this post with a pride to share my Apple Almond Cookies recipe. It is a very simple cookie recipe which tastes great. I never thought apple will give such a flavour to the cookies. If you are a cookie lover, I suggest you to try this. You will never regret. I also made Strawberry Apple Cookies with the leftover apple cookie dough, whose recipe will be posted soon. So do not forget to check out my recipe index.

Apple cookies

When I saw this 'Egg replacement' event hosted by dear Madhuram, I knew I had to participate. But, not with a usual recipe. I wanted to try something different. Atleast for me Apple cookies is very different from the usual ones and instead of eggs, I used silken tofu. If you are a egg lover, you can use eggs instead of tofu. I am also sending this to Hima's Sunday Snacks


Ingredients:

2 cups all purpose flour
1 cup peeled and finely chopped apple
1 tsp baking soda
1 cup butter
1 tsp vanilla extract
1/2 tsp salt
1 cup sugar
1 egg OR 1/4 cup Silken Tofu
1/4 cup Almonds

Apple Almond Cookies

Method: (Eggless)

In a bowl add the silken tofu, butter and sugar and mix them well.

1/4 cup blended silken tofu = 1 egg. Whiz in a blender until completely smooth and creamy, leaving no graininess or chunks.

Now add baking soda,salt,flour, vanilla essence and mix them well.

You can grate the apple after peeling or you can also blend it without adding water.

Add apple and chopped almonds. You can use a blender to chop almonds too. But be careful not to make it powdery.

Preheat the oven to 375 degree F for 10 min.

In a cookie sheet, place the dough in whatever shape you want and bake them at 375 degree F for 12 to 15 min. Mostly 12 min is enough.

Allow them to cool for 5 min and then store it in an air tight container and enjoy!

This is my first time making cookies with silken tofu.I have made eggless cookies but I do not use any egg substitutes. Silken Tofu is a good substitute for egg.You must try it.

Egg lovers you still can make these Apple Almond cookies with eggs. For making these cookies with egg, you just have to beat the eggs with sugar and butter until they blend well and all the other steps are the same.

8.20.2008

You too can bake a simple yet delicious chocolate cake

Cakes - You can not throw a party without them. Be it a birthday party or bridal shower or baby shower or anniversaries there will be cakes. Why go to special days, even your weekend parties won't be complete if you do not have cakes. When it comes to cakes, no one can say 'No' to chocolate cakes. why cakes? Anything with chocolates can't be ignored, at least it is like that for me.

There are a different ways of baking a chocolate cake- With eggs, without eggs, the vegan way. But I am going to share a very very simple way of preparing cakes with eggs. I will be posting a recipe for chocolate cake without eggs soon. Once you have mastered the art of baking, you can do magic with your oven.


Before sharing the recipe of simple chocolate cake, I want to share this crazy experience of mine. Its been over a month that I had bookmarked DK's Zebra cake. I wanted to try that cake. But, being an amateur, I did not want to take risk. Baking an ordinary cake itself is a great accomplishment for me. But,I was lured into making that cake. With a lot of confidence I headed to my kitchen and started preparing the dough for zebra cake. In that process, there is a phase where you have to separate the dough equally so that you can add coco powder in one to get zebra stripes. But, I made an amateur mistake. The dough I separated for mixing coco powder was more. So when I was putting the dough in layers, it messed up. But, I ended up in this simple chocolate cake which had a great taste and looked inviting. I would suggest all out there to bake! bake! bake! as you will end up in new recipes as I did which will do wonders at home.


Now coming to the recipe for simple chocolate cake

Ingredient:

1 1/2 cup of All purpose flour
1 cup of butter
1 1/2 cup of sugar
1 cup milk (room temperature)
1 tsp vanilla essence
1 tbsp chocolate syrup OR 2tsp coco powder
1 tsp baking powder
3 eggs


Method:

1. In a bowl mix the flour and baking powder.

2. In another bowl beat the eggs and sugar till they are blended well.

3. Now add the vanilla essence and milk to the eggs and beat them for few minutes so that the mixture is well blended.

4. Add the flour little by little and blend it to the egg mixture.

5. Now, add chocolate syrup or coco powder and mix well.

6. Preheat the oven at 350 degree F for 10 min. Then place the cake dough in the oven for 30-40 min

7. Check with the help of a toothpick or fork whether the cake is done. The toothpick will come out clean if the cake is done.

8. Allow the cake to cool for 10 min. Enjoy!

Note:

1. Do not open the oven for at least the first 25 min as this will disturb the cake formation.

2.Do not over beat the mixture that will form bubbles.

8.18.2008

Homemade Delicious Eggless Chocolate Chip Cookies

Kids go wild when they see cookies, especially chocolate chip cookies. Why kids, even adults can't control their appetite for chocolate chip cookies. This type of cookies is very famous in the United states and is often baked in most of the homes here. I bet there will be no parties without these chocolate chip cookies! They are so scrumptious and have such a great aroma and texture to them. When I started my baby steps in baking, I wanted to bake this cookie and throw a party at my place, just to brag about my cookies. One good thing that has happened to me in the US is, I am able to try out new things with my oven, which otherwise would have been just a dream.


With all the enthusiasm a amateur baker would have, I started to prepare the dough for these cookies after deciding the recipe. I did browse through a lot of chocolate chip cookie recipe and finally decided on one. But, when I searched for the ingredients in my kitchen cupboard, I was in short of few. The original recipe had Brown sugar, eggs, Maple syrup. But I had only powdered white sugar and chocolate syrup. I wanted to bake these cookies very badly that I decided to take the risk of making the variation. I was a bit skeptical because these are my first batch of chocolate chip cookies ever made. Now coming to this baby baker's recipe of Eggless chocolate chip cookies.


Ingredients:
1 cup of All purpose flour
1 cup of powdered white sugar
1 cup of butter/ghee
1/4 cup of chocolate chips
1 tbspn chocolate syrup
1/2 tsp of baking powder
1tsp vanilla essence


Method:

Preheat the oven at 350 degree F for 10min.

Meanwhile, prepare the cookie dough by mixing all the ingredients in a bowl.

Take a small amount of cookie dough and press it to make it in any shape of cookie you want.

Place it in the cookie tray and bake it for 10-11 min at 350 degree F.

Check if the inside is baked with the help of a fork.

Allow it to cool for 5 -8 min. With the help of spatula remove the cookies and store it in an air tight container.

Note: I refrigerated it for 5 min before serving. It helps the cookies to be soft at the same time crispy.

Here is a recipe for Vegan Chocolate chip cookies. I liked the fact that this recipe did not use any of animal products. Hope you like this version too.

8.06.2008

Eggless Vanilla Nuts Cookie/Biscuit

With all the voting going on for the Eat healthy event, I am full of excitement. Thanks to all. Do vote for your favourite protein rich recipe before 10th Aug'08 in My Blog

When I started my food blog, which is nearly 5 months ago, I came across many blogs dedicated to baking. Initially, I used to think that baking is very tough and you must go to classes to learn the art of baking. But with the help of my other foodie friends, I am now proudly presenting my first ever baked cookie/biscuit.

Though, I prayed God that these cookies must come out well, I whole heartily believed in the recipe given to me by my neighbour. Yes! I made Eggless Vanilla Nuts Cookie/Biscuit. Why vanilla? By now, everyone who knows about me must be aware that I am a great Vanilla fan. Be it Vanilla Milkshake, Vanilla Ice cream or Vanilla Cake, I will be the first in the queue. So, my first cookies are also of Vanilla flavour.

Before coming to the US, I am more familiar with biscuits than cookies. I thought both are different. But now, I know it is just a way of calling them. Its name derives from the Dutch word koekje or (informal) koekie which means little cake, and arrived in the English language through the Dutch in North America. It spread from American English to British English where biscuit is still the more general term. Being an Indian, we have more of a British influence, in anything we do.

This is one of the simplest cookie and perfectly suitable for a newbie in baking like me.


Now for my Eggless Vanilla Nuts Cookie recipe,

Ingredients:

1 Cup All purpose flour
1 Cup Sugar
1 tsp Vanilla essence
1 tsp baking powder
1/2 cup nuts (I used Mixed Nuts.You can use anything)
1 cup Butter/Ghee


Method:

In a bowl mix the all purpose flour, sugar,nuts and baking powder.

Melt the Butter and pour it into the bowl and mix it with the flour when hot.

Add Vanilla essence and mix well and form a dough. Make the cookies in whatever shape you want.

Preheat the Oven to 325 degree F for 10 min.

Place the cookies in the cookie tray and bake it in the oven at 325 degree F for 10 min.

Allow it to cool. Serve it as dessert or a snack.

Note: This cookie is more crispy and tasty if consumed after 1 day.

7.31.2008

Baked/Fried Vegetable Cutlet and an update


It has been months that I have prepared this vegetable cutlet. It is one of my hubby's favourite. Though previously, I used to deep fry it oil, this time I tried baking it. Initially I was skeptical about baking, as I am still learning as a baker. Seeing a lot of bakers and their blogs I got inspired and decided to bake it. I was lucky! The Vegetable cutlet turned out to be very tasty and great looking.

With no further delay, here is the recipe of Baked/Fried Vegetable Cutlet

Ingredients:

1 cup of vegetables which includes Beans, carrot, Peas, cauliflower, Potato
1 tbsp of chick peas
1 tsp of chilli powder
Salt to taste
1/4 cup of cilantro, finely chopped
1 tbsp of cashew nuts (optional)
1 tsp of coriander powder
1 tsp of cumin powder
1 tsp of cumin seeds
A pinch of Hing
1 tsp of Ginger garlic paste
Oil for deep frying. If baking, you will need 2 tsp of oil to prepare the mixture.

To dip:

A thin mixture of 1 tbsp of all purpose flour and water.

To Coat:

1 cup of bread crumbs

Method:

Pressure cook all the vegetables and chick peas till you get 3 hisses.

Immediately release the pressure and remove the vegetables from the cooker.

Separate the potato alone and peel and mash it in a bowl.

Place all the other vegetables in a tissue paper and squeeze to remove excess water.

In a Pan, add oil, cumin seeds and saute them. Now add ginger garlic paste and cashew and saute.

Add the vegetables and mix well. Add chilli powder,turmeric powder,cumin and coriander powder and mix well. Now add salt.

Saute them until the water is evaporated.

Now add this mixture to the mashed potato along with finely chopped cilantro and mix well.

Take small amount of this mixture and make it into a cutlet shape, it can be round, oval or heart shaped and dip it in the all purpose flour and water mixture and immediately coat them with bread crumbs. This step needs to be done very quick so that we can prevent the cutlets from absorbing more water.

To Bake the Vegetable cutlet:

Preheat the over to 375 degree F and Place these cutlets in the baking pan for 15 -20mts.

Now remove the pan and turn the cutlets and bake it for another 15 mts.

Remove and serve hot with Chilli/Tomato sauce.

To Fry the Vegetable cutlet:

In a Pan, add enough oil and deep fry them until they are brown.

Serve hot with Chilli/Tomato sauce.

Note: In either case, make sure that the cutlet mixture has less moisture it in. This will help in getting a crispy vegetable cutlet.

Regarding the Update:

I am very happy with the overwhelming response to the Eat Healthy Protein rich contest. I have totally received 170 entries which includes 2 of my own entries. I am currently working on the round up and will soon post the mega round up. Also I have a winner whose blog will be featured in my blog for a month. I will reveal the details of this winner in my round up but as of now just wanted to share that she has sent me 27 entries. Keep guessing...

As for the winner of $20 gift card, I will select the top 5 recipes ( The number may increase as I find many interesting recipes) and you all need to vote! These recipes will be selected based on the uniqueness and the amount of protein content and also originality. The voting poll will be open soon in my blog. Come back to get more details on the round up.


A VERY BIG THANKS TO ALL OF YOU WHO HELPED ME MAKE THIS CONTEST A GREAT SUCCESS!

I will be posting the topic for next month event asap.