Garlic Bread- The most Luring Bread Variety

Garlic bread is a great appetizer. This a very easy and simple way to make your own.

Pasta in chilli Sauce

Pasta has become a weekly dinner for us. This is yet another very easy and quick to make Pasta recipe.

Coconut Cookies

A Yummy delight. Easy, simple and delicious cookies make at home within minutes.

Capsicum Rice - Must try!

Capsicum + Rice = Delicious! , A must try vegetarian healthy recipe.

Healthy Spinach Rolls

Easy and healthy snack ,the kids will love.

SUBSCRIBE via RSS
What is RSS?

OR SUBSCRIBE Via email:

7.31.2008

Baked/Fried Vegetable Cutlet and an update


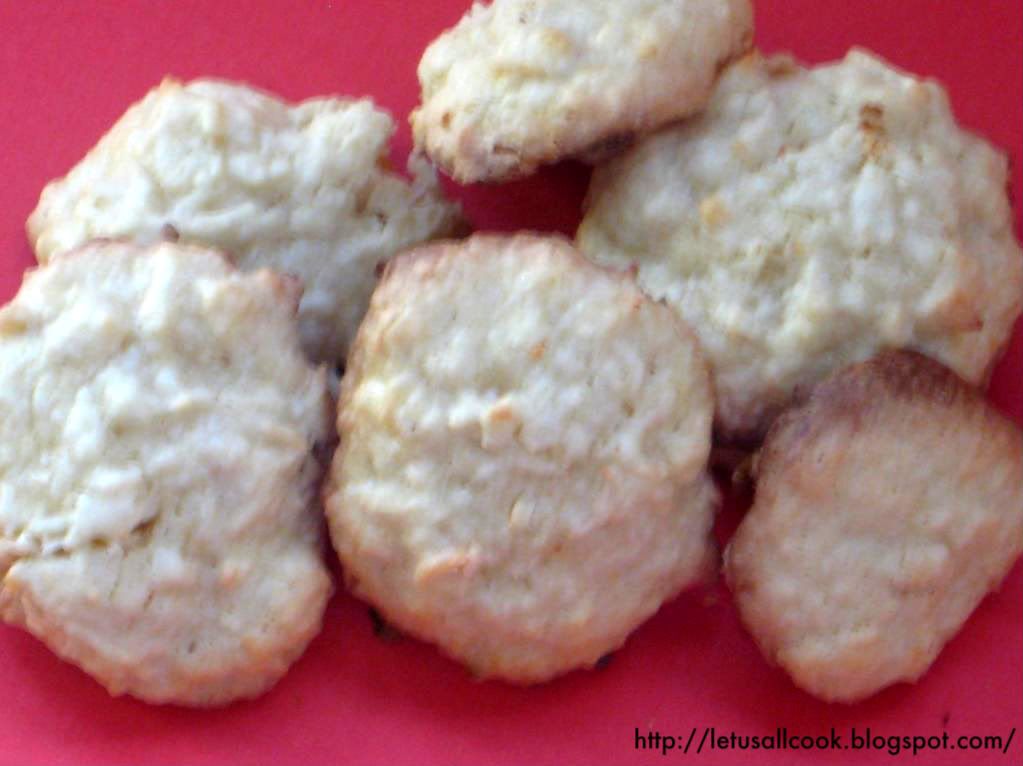
It has been months that I have prepared this vegetable cutlet. It is one of my hubby's favourite. Though previously, I used to deep fry it oil, this time I tried baking it. Initially I was skeptical about baking, as I am still learning as a baker. Seeing a lot of bakers and their blogs I got inspired and decided to bake it. I was lucky! The Vegetable cutlet turned out to be very tasty and great looking.

With no further delay, here is the recipe of Baked/Fried Vegetable Cutlet

Ingredients:

1 cup of vegetables which includes Beans, carrot, Peas, cauliflower, Potato
1 tbsp of chick peas
1 tsp of chilli powder
Salt to taste
1/4 cup of cilantro, finely chopped
1 tbsp of cashew nuts (optional)
1 tsp of coriander powder
1 tsp of cumin powder
1 tsp of cumin seeds
A pinch of Hing
1 tsp of Ginger garlic paste
Oil for deep frying. If baking, you will need 2 tsp of oil to prepare the mixture.

To dip:

A thin mixture of 1 tbsp of all purpose flour and water.

To Coat:

1 cup of bread crumbs

Method:

Pressure cook all the vegetables and chick peas till you get 3 hisses.

Immediately release the pressure and remove the vegetables from the cooker.

Separate the potato alone and peel and mash it in a bowl.

Place all the other vegetables in a tissue paper and squeeze to remove excess water.

In a Pan, add oil, cumin seeds and saute them. Now add ginger garlic paste and cashew and saute.

Add the vegetables and mix well. Add chilli powder,turmeric powder,cumin and coriander powder and mix well. Now add salt.

Saute them until the water is evaporated.

Now add this mixture to the mashed potato along with finely chopped cilantro and mix well.

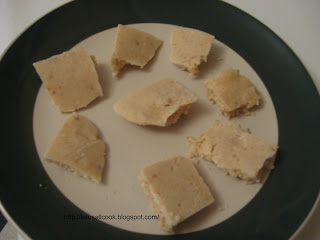
Take small amount of this mixture and make it into a cutlet shape, it can be round, oval or heart shaped and dip it in the all purpose flour and water mixture and immediately coat them with bread crumbs. This step needs to be done very quick so that we can prevent the cutlets from absorbing more water.

To Bake the Vegetable cutlet:

Preheat the over to 375 degree F and Place these cutlets in the baking pan for 15 -20mts.

Now remove the pan and turn the cutlets and bake it for another 15 mts.

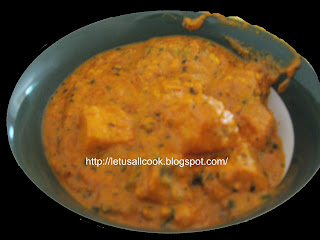
Remove and serve hot with Chilli/Tomato sauce.

To Fry the Vegetable cutlet:

In a Pan, add enough oil and deep fry them until they are brown.

Serve hot with Chilli/Tomato sauce.

Note: In either case, make sure that the cutlet mixture has less moisture it in. This will help in getting a crispy vegetable cutlet.

Regarding the Update:

I am very happy with the overwhelming response to the Eat Healthy Protein rich contest. I have totally received 170 entries which includes 2 of my own entries. I am currently working on the round up and will soon post the mega round up. Also I have a winner whose blog will be featured in my blog for a month. I will reveal the details of this winner in my round up but as of now just wanted to share that she has sent me 27 entries. Keep guessing...

As for the winner of $20 gift card, I will select the top 5 recipes ( The number may increase as I find many interesting recipes) and you all need to vote! These recipes will be selected based on the uniqueness and the amount of protein content and also originality. The voting poll will be open soon in my blog. Come back to get more details on the round up.


A VERY BIG THANKS TO ALL OF YOU WHO HELPED ME MAKE THIS CONTEST A GREAT SUCCESS!

I will be posting the topic for next month event asap.

7.29.2008

Specially for Dear Sia!

Photobucket

Yesterday when I was posting about my Mango milkshake I had 5 events in mind. But when I read the rules for Sia's WBB Summer Feast, I misunderstood that we have to cook something solid for this event. Today, Dear Sia let me know that she will give a warm welcome to my smoothie/milkshake , so here it goes to Sia's WBBsummer Feast. You can find the recipe of Mango Smoothie/Milkshake here.

Photobucket

Now for my other entry to Sia's JFI- Soya. Many a times I have wondered why I need to cook soya? Though it has got a lot of protein in it, it does sometime make me feel 'why am I eating this Soya?' Anyways, I had prepared this Soy Meal maker long back when I was in TN with my friend. I am reposting it so that I can send it to this event. Also I am sending this to Eat healthy - protein rich event hosted by me.

Enjoy hosting dear Sia!

7.28.2008

Mango Milkshake/Smoothie - A Refreshing Summer Drink!

Its summer time! Most of us will be stocking our fridge with drinks,Soda etc. With summer it is pure enjoyment. Playing, outing, walking outside, sitting in the patio for long time....those we can't do in winter! With summer in mind, there are a lot of events taking place in this food blogosphere. Now here is my humble contribution to few of the events, Mango Milkshake/Smoothie.

To prepare Mango Milkshake/smoothie, you need:

2 to 3 Mangoes
1 cup of sugar
1 tbspn yogurt
1 cup Milk
A pinch of salt

Method:

Peal and cut the mangoes into small pieces.

In a blender, add these mangoes, sugar, milk, yogurt and salt and blend it for 3 to 4 minutes.

The more you blend the more creamy and juicy the milkshake/smoothie will be.

Refrigerate it for 30mts and enjoy!

This drink is going to the following events,

Aartee's Summer Splash


Enjoy Ladies! Happy hosting!

7.25.2008

Masal Dosa - A famous South Indian Dosa variety

Dosa, a very famous South Indian recipe, can be served for breakfast or for Dinner. Mostly, it is preferred during breakfast, but in some houses like us, we eat tiffen for dinner and hence these dosas become part of dinner too. Most of the Non-Indians, to my knowledge, are aware of this recipe, but still there are a few who are new to this dosa. There are many variations of dosa. At this time I must say about the Dosa mela hosted by my dear Srivalli. Here you can find humongous varieties of Dosa and how they are made.


The Basic method of preparing Dosa is the same but with slight variations, we can do wonders with this recipe. To make Dosa all you need is the Dosa batter. This is really easy to prepare. I will write a detailed post on preparing Dosa and Idly batter soon. But for now, you just need to know that for this dosa, the batter is prepared by soaking 3 cups of Rice and 1/2 cup of Urad dal and grinding them and allowing them to ferment overnight.


Coming to Masal Dosa. This is a widely served breakfast in India. Many kids love to eat this, as the masal will be placed inside the dosa and when you eat the dosa with the masal, it does gives you a different yet tasty flavour. For masal dosa, all you need is Masal along with dosa.(Duh!)


For preparing the masal for masal dosa you need,

1 cup potato, cooked,peeled and mashed
1 cup onions finely chopped
1 green chilli
1 tsp of chilli powder
Salt to taste
1 tsp of turmeric powder
1 Garlic flake (optional)
Few cilantro finely chopped
Fried Cashew (optional)
2 tsp of oil
1 tsp of lime juice
1 tsp of mustard
1 tsp of cumin seeds
A pinch of hing
1 tsp Urad dal
1 tsp channa dal

Method:


In a pan, add the oil and allow the mustard seeds to splutter. Then add hing and cumin seeds.

Add urad and channa dal and saute them.

Now add the onions and saute them. Add the green chillies, fried cashew and garlic and saute them.


Add chilli powder,salt, turmeric powder and mix well. Add little water so that these spices are not burned.


Add the mashed potatoes and mix well. Garnish it with cilantro.


Add 1 tsp of lime juice, mix and switch off the stove.


For masal Dosa


Prepare the dosa by taking small amount of the batter and spread it in the Tawa/grill in a circular shape (or your favourite shape) and cook it with few drops of oil or ghee until golden brown.


Place this masal inside the dosa, fold it and serve hot with chutney or sambhar.


Here it is the lovely Masal Dosa ready to eat!


7.23.2008

Cluster Beans or The Indian Beans (Kothavarangai) Poriyal

Whenever we go for grocery shopping, we come across this cluster beans/Indian beans/Kothavarangai, but will be highly hesitant to buy because of its price. Yes, it is costly! at least in our Chicago area. Though we both do not have that much love for kothavarangai/cluster beans/Indian beans, this time I decided to try it out. Now, I was in a dilemma whether to cook this kothavarangai either as poriyal or as kootu. Both can be used as side dish. However, I remembered one of my in law's recipe and hence decided to do Kothavarangai/Cluster beans/Indian beans Poriyal.
Ingredients:
Cluster beans/Indian beans/Kothavarangai - 1 cup
1 tsp urad dal
1 tsp channa dal
Few curry leaves
2 tsp chilli powder
Salt to taste
1 tsp mustard
A pinch of Hing
2-4 tsp of Groundnut powder
2 tsp of oil

Method:

Cut the cluster beans and wash them.

In a pan, add oil, mustard seeds. When the seeds pops, add hing, urad dal, channa dal and curry leaves. Saute them for few seconds.

Add the cut cluster beans and some water to cook the beans. Throughout this process do cook in a medium flame.

Occasionally stir and see if it requires more water to cook.

When you are sure that the beans is cooked, add the groundnut powder and mix well.

Serve hot.

Note:

For the groundnut powder, just grind the raw ground nut or roast the ground nuts and grind them into a fine powder. Either way it adds great flavour to the dish.

While cooking the beans, make sure that you do not overcook or add excess water. This may spoil the dish.

7.22.2008

Homemade Baked Tortillas with juicy Mango Dip

Tortillas - One of the crunchiest snack I have ever tasted. I love the taste, but when its a fried item, it does make me feel guilty. Not that I am dieting and all, I am now a days very health conscious. When I saw these lovely,crispy, crunchy tortillas prepared at home by my dear friend Zlamushka of Zlamushka's spicy kitchen, I was really happy. Now I know a way to prepare them in my kitchen without using oil. Hurray! and here I am with the homemade baked tortilla chips.

Take a look at the recipe of Baked homemade tortilla chips. I just added chilli powder and some coriander powder to give a spicy taste. I also prepared Mango dip to go along with this tortillas.

Day before yesterday, we went to Costco and I found lovely mangoes there. As you all know, you get only in big quantities in these warehouses, I got nearly 6 to 7 mangoes. Though I love eating these mangoes just like that, I wanted to try out something new with these mangoes. When I was browsing I came across this lovely Mango Dip.

For Mango Dip You need
1 mango
1 cup yogurt (Plain. But if you want it to be flavoured, go ahead...be the boss)
1 tsp chilli powder
1 tsp cumin powder
Salt to taste

Method:
Peel the mangoes and cut them into small pieces. In a blender add the cut mango and all other ingredients and blend them till they are smooth and evenly mixed.
Transfer it to a container and if you want you can decorate with cut coriander leaves. I did not do this because by husband doesn't like it that way.


This dip is very spicy. It combines a sour,sweet and spicy taste which makes you want more. Also it goes well with these tortillas or any chips for that matter. It sure makes a very good evening snack.

7.21.2008

Paneer Tikka Masala (Marinated Cottage Cheese cubes cooked the Indian way)

Paneer - One word that makes me drool. I know there are many like me who loves to eat paneer, however cooked. There are numerous recipes with Paneer - The South Asian cottage Cheese , Can I say? Paneer is a protein rich food and I thought why not cook something with Paneer and send it to my Eat Healthy Protein Rich Contest. Of course This entry will not be considered for the prize. LOL! ok fine. Now coming to the great Paneer Tikka masala. Whenever I think of tikka masala I just can't keep thinking about the Chicken Tikka served in hotels. Though I am a vegetarian, I love the way few non-vegetarian recipes are presented and served in the hotels. And this food is one among them. When I thought of a substitute for chicken to try at home, two things came to my mind. One is Soy (meal maker) and the other is Paneer. I don't know how Soy Tikka masala will taste like, but can tell you for sure, that Paneer Tikka masala will make you go glutton.


Paneer can be prepared easily at home and there are a numerous blogs that teaches you how to prepare paneer at home. I have not tried it, so my blog doesn't have one yet. But will soon be trying, so a post on how to prepare homemade paneer is on its way. When I was searching for a recipe to prepare this scrumptious food, I came across this lovely blog Cook Easy by Rachna. Though, I guess she has stopped writing (Her last entry was on Nov 30, 2006), this recipe was really luring me to cook. She has explained it so very well that I did not add anything to her recipe. Mine is an exact replica of hers. Take a look at her Paneer Tikka Masala recipe.


Now for my experience with this delicious recipe. I first wanted to prepare Paneer at home and try this recipe. However, I didn't have the patience to wait till next week because I did not have curd in my kitchen. Oops! so what else ...the next minute I was running (not literally ;)) to the grocery shop near by. Great, now I have all the ingredients to prepare my favourite paneer Tikka masala. This is the first time I prepared this recipe and I am so very happy that it came out really good.


The very next thing that came to my mind is, Your Recipe Rocks. Though I know about this event for more than 3 months, I couldn't participate. Really do not know why. But, now I have this Paneer Tikka masala recipe walking to Your Recipe Rocks event hosted by Madhuram of Eggless cooking. I love eating this food the way it is. In Tamil we say, 'Appidiye sapiduven' like in horlicks advertisement!


This recipe is also walking to Curry Mela hosted by Srivalli. Another inspiring food blogger. With her roti mela and dosa mela I learnt a lot about the varieties and with this curry mela I hope to learn more and become a pro.


And one more... off it goes to Paneer: A delicacy hosted by Vandana of Cooking up something nice.


So...what do you say about my multitasking Paneer recipe :) - One recipe to 4 events!

7.18.2008

Kaju Katli - The most delicious sweet with cashews

Whenever I go to a sweet shop, the first sweet that I will search for is Kaju katli - Cashew sweet. This is one of the richest sweet. You know why I call it rich...yes both its flavour and its cost is high when compared to other sweets. Yet, the one sweet that makes me glutton is this Kaju katli. Though it is high is calories, you can consume it occasionally, just to treat yourself for your great achievements. Till yesterday, I used to think that this is one big difficult sweet to prepare. But now, I completely changed my opinion after making a trial at my new kitchen. It took only about 15mts to prepare this sweet and of course it was scrumptious. When I was browsing my old cook I came across this easy recipe for making Kaju katli - the sweet with cashew! Here I am sharing the kaju katli recipe with you.


Ingredients:

1 cup of cashew

1 1/2 cup of sugar

2 tsp of milk

3/4 cup of water

A pinch of cardamom powder

1 tbsp of Ghee/melted Butter


Method:

In a heavy pan, add the water and sugar and mix it well to make the syrup. Add milk to it when the syrup comes to a boil.

Meanwhile, grind the cashews in a mixer so that it becomes evenly powdered. Do this step carefully as while grinding it may form lumps.

Add this powdered cashew to the sugar syrup little by little and stir continuously so that we can avoid lumps getting formed.

Cook in Sim flame till the mixture becomes semi-solid and comes without sticking to the vessel.

At this time add ghee and cardamom powder and mix well and immediately switch off the stove.

Pour this mixture on a plate covered with aluminium foil and allow it to cool.

Cut it into diamond shape or your favourite shape and store it in an air tight container.
I couldn't wait to taste them, so I cut them while they were hot, which made me end up with a kind of irregular shaped katlis...you wait till it cools down to get better shape.

Note: Kaju Katli is a very famous sweet in the North India and you can make this for any of your parties and impress your guest with something rich and be proud!

7.17.2008

Arisi Upma - A great tiffen with raw rice


This upma with raw rice is my favourite. It is called Arisi upma and it is a very well-known tiffen item in south India. The preparation is very simple and this dish is delicious with coconut chutney. However my favourite side dish for this food is tomato chutney.


Ingredients:


Raw Rice (Pacha Arisi) - 1 cup
Onion 1 cup (optional)
whole black pepper - 1tsp
Channa dal 2tsp
Red Chillies 3 to 4
Mustard Seeds ½ tsp
Cumin Seeds 1 tsp
Curry Leaves
Hing (Asafoetida) 1/4 tsp
Salt to taste
1 tbsp Oil


Method:

It is advised to soak the rice for 4 hrs and dry them in hot sun before grinding. However, I do it without this step. Either way it tastes great. But, if you want to follow the correct way of doing this dish, I would suggest you to dry the rice before using it for this preparation.

Coarsely grind the rice and the whole pepper it in a mixer/blender, little by little so that all the rice are evenly broken.

You can either do this with pressure cooker or you can also use a heavy based vessel or kadai.

Heat the oil in the vessel and add mustard seeds, cumin seeds, red chillies, channa dal, hing and curry leaves.

Then, add the onions and saute them well until the onions start changing colour.

Add the coarsely ground rice and saute for a minute.

Pour 3 cups of water and add salt and stir well.

When the water starts boiling you can either off the stove and transfer the contents the pressure cooker or you can continue to cook in the same vessel in Sim flame.

If you choose to use the vessel to cook, make sure that you watch at regular intervals and stir occasionally so that the food doesn't get burnt.

If you choose to pressure cook, then wait for 4 whistles. Switch off the stove and allow it to cool.

Serve hot with your favourite side dish.

7.16.2008

Lamb Leg (Attukal) Soup - An easy and Tasty way to cook Lamb

Whenever I come across Soup recipe list, the fist thing I search for is sweetcorn soup in vegetarian and Lamb leg (attukal) soup in non vegetarian category. The vegetarian soup is my favourite and the non vegetarian is my husband's. Though I do not know how to cook non vegetarian, my mother-in-law fills the place. She is an awesome cook as far as non-veg is concerned. When we were in India this time, me and my husband gave our favourite menu list for her to cook and wow! every time she cooks, the food gets its own flavour! The very first menu request from my husband was attukal soup and within minutes she made it.

With Lamb, you can cook a different variety of food -
Lamb biriyani, Lamb soup etc. For this Soup preparation, she uses a specially prepared powder in addition with pepper powder. First I'll share the recipe and then the way to prepare this soup powder.

Ingredients:
Lamb Leg - 4
1/4 cup onions
1 tsp pepper
2-3 tsp soup powder
Salt to taste
1 tsp olive oil
1 tsp cumin seeds
2-3 flakes of garlic
2 green chillies

Method:
Clean the Lamb leg. In a pressure cooker, mix the lamb leg with this all the above ingredients and pressure cook it.


Add enough water (till the lamb is fully covered with watter).


Pressure cook it till you get 2 hiss. Now cook it in Sim flame for 20 mts.


Take out the lamb along with water and serve hot.


Soup powder:
50g - whole black pepper
100g - Dhaniya (cilantro seeds)
1 1/2 tsp of sombhu (Fennel Seeds)

Grind the above ingredients in a mixer and use it as soup powder. You can use it for any soup, it gives a rich flavour and taste to the soup.

This soup is very good for people suffering from cold as it gives immediate relief.

7.15.2008

I am back with Lemon Rice!

Have you ever felt that time is running so fast? I did, recently. My 1 month vacation is over in a blink! Wow! Going on vacation is real fun and that too when you go to your native place to meet your family and friends. Nothing can equal this joy. I had a great time in India. Ate all my favourite dishes and spent time with my family. Jeez! I miss them. Though the travel time is nearly 22hrs, I managed to sleep most of the time so that I can avoid Jet lag. Visited Tirupathi and attended few functions and now I am sitting in my new apt cherishing all my memories. Yes I am Back! We shifted to a new apartment and now I have to get accustomed to this new environment and set things.

You may ask, what did you cook so soon with nothing much in your kitchen? Of course, the all time saver, Lemon Rice. This is the most easiest recipe I have ever come across, of course next to curd rice. I have tasted lemon rice in many of my friends and relatives place, but only few recipes lure me to eat them more.
I am sharing my favourite lemon rice recipe which makes me eat more lemon rice even when I am on a diet.


Preparation time is 30 mts. This time is just to cook the rice, all the other preparation takes less than 5mts. For a beginner, I would suggest you to do this dish more carefully, as even a minute mistake will spoil the taste of this dish.

Ingredients: (For 2 people)

1 Lemon for taking lemon juice or you can also use the Lemon squash that you get in shop. But fresh lemon juice adds a lot of flavour and aroma to this recipe.

1 cup Rice (You can go for either basmati rice or your normal rice). If you do this recipe more often I would suggest you to go with the normal rice as more intake of basmati rice is not that good for health.

2 cup of water if normal rice OR 1 1/2 cup of water for basmati rice

1 tsp of Urad dal
1 tsp of channa dal
2 Green chillies
A few pieces of cut ginger
Finely cut cilantro for garnishing
1tsp of turmeric powder
2tsp of oil
1tsp of mustard seeds
A pinch of Hing powder
Salt to taste

Optional:
1/4 cup of fried ground nuts
1 tsp of cashew

Method:
In Rice cooker, cook the rice with the required amount of water.

In a pan, add some oil, mustard seeds. When the seeds pops, add hing, urad dal, channa dal and saute them.

Add Green chillies, turmeric powder and ginger and saute them for few seconds.

After the rice is cooked, cool it for few minutes. Add the mixture from the pan and mix well.

Add the lemon juice, salt, ground and cashew nuts and mix well.

Garnish it with cilantro and serve with papad or any of your favourite side dish.

There are many other ways of preparing this lemon rice, but this is my favourite way.

7.14.2008

Eat Healthy Protein Rich Contest UPDATE

I am so happy to find my mail box flood with protein rich entries. So many entries with easy yet healthy recipes. Thanks to all of you who have contributed and planning to contribute. I apologize for not acknowledging most of the entries I received. As I was busy with my vacation, I never had time to reply each and every entry.Hope you all understand. I confirm through this post that I received all your entries and I appreciate all your effort.

Nearing the end date for this contest, I received mails from few of you asking to extend the contest end date so that you can participate and send in more healthy recipes. I do appreciate your enthusiasm and have decided to extend the end date for this contest till Jul 30 , 2008 midnight

Hope you all are having great fun and would be happy if you all could utilize this extension and send in more entries for the event making it a great success.